A Step-by-Step Guide to Drilling Walbro Carburetor Jets
If you’ve ever struggled to get your chainsaw or small engine running smoothly, you’re not alone. Many people find tuning Walbro carburetor jets to be a tricky but rewarding task.
To drill Walbro carburetor jets, start by gathering essential tools like high-speed drill bits and a precision caliper. Clean your carburetor thoroughly and disassemble it while noting part placement.
Secure the jet in a vise, then use a smaller drill bit first to create a pilot hole. Gradually switch to the final bit size, applying steady pressure.
After drilling, clean the jet and test your engine’s performance. You’ll uncover fine-tuning techniques that can further improve your setup.
Key Takeaways
- Clean and disassemble the carburetor, making sure all parts are free of dirt and are properly noted for reassembly.
- Secure the jet in a vice, then start with a smaller bit to create a pilot hole. Gradually drill to the desired size.
- Keep an eye on the drilling pressure to prevent wobbling and to ensure a clean cut, while preserving the jet material.
- Once drilled, thoroughly clean the jet to remove any debris and contaminants that could impact performance.
- After installing the jet, test the engine by checking throttle response and exhaust emissions to make sure the air-fuel ratio is optimal.
Understanding Walbro Carburetor Jets
When you get into Walbro carburetor jets, it’s important to understand what they do for engine performance. These jets control how much fuel flows into the engine, which directly affects how well your machine runs. If you’re into tuning, you’ll see that adjusting these jets can really boost throttle response and power.
Picking the right jet size and type is key. A bigger jet lets in more fuel, which can improve performance but might cause flooding if you’re not careful. On the other hand, a smaller jet can save fuel but might limit power.
Trying out different sizes helps you find the perfect balance for your engine setup. Once you understand how jet flow works, you can fine-tune your engine to run smoothly and efficiently. This knowledge makes your tuning efforts more successful and satisfying.
Essential Tools for Drilling Walbro Jet Sizes
Before you start drilling your Walbro jet sizes, it’s essential to have the right tools on hand. Using the correct equipment not only makes the process easier but also ensures you’re mindful of the jet material considerations. Different materials can affect your drilling techniques, so choose wisely.
Before drilling your Walbro jets, ensure you have the right tools to make the process easier and protect the material.
Here are three must-have tools:
- Drill Bits: Pick high-speed steel bits that are suitable for the jet material.
- Caliper: A precision caliper helps you measure your jets accurately.
- Bench Vise: Use a bench vise to hold the jets securely and prevent movement while drilling.
Having these tools ready will help you work efficiently and get consistent results. Remember, the right gear makes all the difference in achieving your desired jet size without damaging the material. So, gather your tools and get ready to drill!
Measuring Jet Sizes Accurately for Precision
Getting the measurements right is key when it comes to jet drilling. Using the proper tools makes all the difference in ensuring your measurements are accurate. And don’t forget—understanding jet size designations is just as important. Knowing what those numbers mean helps you pick the right size for your carburetor. Let’s take a closer look at how these factors come together to make your tuning process smoother and more precise.
Tools for Accurate Measurement
Achieving precise measurements when drilling Walbro carburetor jets is crucial for the best engine performance. Having the right tools makes all the difference. The accuracy of your measurements directly impacts the jet size you create, which affects engine efficiency.
Here are some key tools you’ll need:
- Calipers: For measuring jet sizes accurately, both inside and outside.
- Drill Bits: Use high-quality bits suitable for different jet materials.
- Micrometer: Great for precise measurements, especially with finer tolerances.
Using these tools helps you maintain measurement accuracy, ensuring your modified jets work as intended. Don’t underestimate the importance of precision; it’s vital for optimizing engine function.
Understanding Jet Size Designations
Having the right tools is just the first step; understanding jet size designations is equally important for precision in your drilling process. Jet sizes are usually measured in thousandths of an inch, and even small differences can make a big impact.
A smaller jet might limit fuel flow, while a larger one can cause too much fuel to be delivered. Knowing how jet size affects your engine’s performance helps you make better adjustments.
Pay attention to jet size variations because different manufacturers might label sizes differently. Always check your specific carburetor’s specs to ensure you’re drilling accurately.
This knowledge allows you to fine-tune your setup for peak performance, boosting both efficiency and power.
Preparing Your Carburetor for Drilling Modifications
Before you get started with drilling, make sure you’ve got all the tools you’ll need. It’s a good idea to clean your carburetor really well first—any dirt or debris can mess with how it performs later on. Once everything’s spotless and you’re set up with the right tools, you’ll be ready to make those modifications smoothly and effectively.
Gather Necessary Tools
To successfully modify your Walbro carburetor for drilling, you’ll need a few essential tools. Having the right equipment ensures you can work effectively with different jet materials and use the right drilling techniques.
Here are three must-have items:
- Drill Press or Hand Drill: A stable drill is important for precision.
- Drill Bits: Choose bits that match the size of the jets you want to modify.
- Calipers: Use calipers to measure jet dimensions accurately.
With these tools, you’ll be ready to start drilling. Make sure each item is suitable for the jet materials you’re working with, as this will impact your results. Happy drilling!
Clean Carburetor Thoroughly
Cleaning your carburetor thoroughly is essential because any residue can interfere with drilling and affect performance. Start by disassembling the carburetor, making sure to note where each part belongs.
Use a high-quality carburetor cleaner to remove dirt and deposits. Pay special attention to the jets, as cleaning them is critical for optimal fuel flow.
For stubborn gunk, use a soft brush to gently scrub the surfaces. Rinse everything with clean solvent and dry it completely before reassembling.
This step is a key part of carburetor maintenance that guarantees your modifications will work as intended. A clean carburetor leads to better performance and longer life, so don’t skip it. You’re setting yourself up for success!
Safety Precautions Before Drilling Jets
While drilling Walbro carburetor jets can boost performance, it’s really important to stay safe. Taking the right precautions not only keeps you protected but also helps you get the best results.
Different jet materials, like brass and aluminum, need specific drilling techniques. Knowing these before you start is a must.
Here are some key safety tips to keep in mind:
- Wear Safety Goggles to keep metal shavings and debris out of your eyes.
- Use a Workbench to hold your carburetor securely, so it doesn’t slip.
- Keep a Fire Extinguisher Nearby just in case, especially since you’re working with flammable substances.
Step-by-Step Instructions for Drilling Jets
Now that you’re all set to start drilling your Walbro carburetor jets, let’s make sure you have everything you need. First, gather your essential tools—things like the right drill bits, a steady hand, and maybe some magnification if you need it. Having the right tools makes all the difference, so take a moment to check that you’re prepared.
Next up, it’s really important to get the hang of the jet drilling technique. You want to be precise and careful to get the best results. Practice a bit if you can, and take your time—rushing can lead to mistakes. With a little patience and the right approach, you’ll be able to drill the jets accurately and efficiently. Once you’re comfortable with the process, you’ll see just how satisfying it can be to do it yourself!
Essential Tools Required
To successfully drill Walbro carburetor jets, you’ll need a few essential tools that guarantee accuracy and efficiency. The right tools help you handle different jet materials and ensure you’re using the right drill types for the job.
Here’s what you should gather:
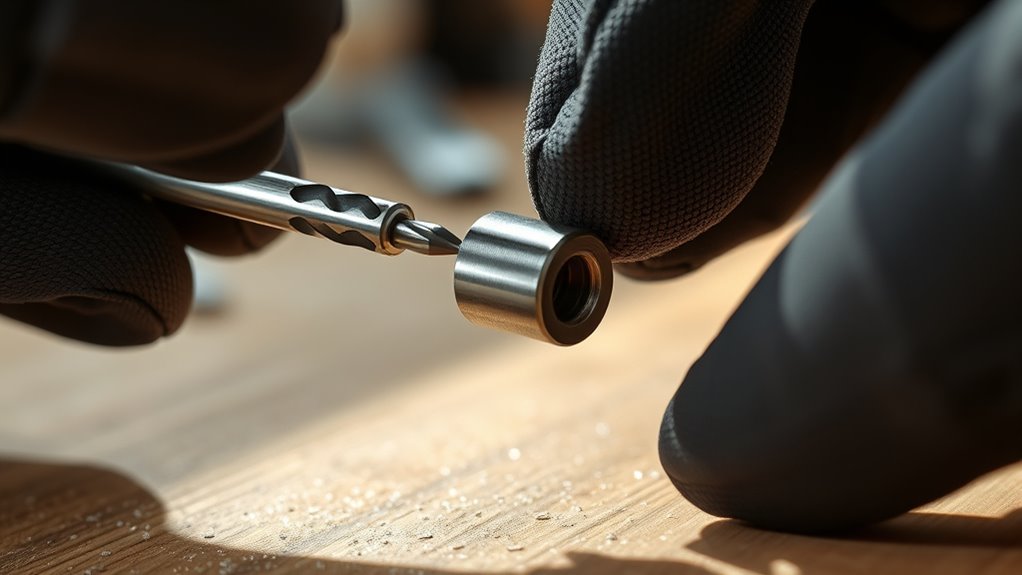
- Micro Drill Bits: These give you precision for fine adjustments.
- Pin Vise: This handy tool helps you control the drilling process.
- Caliper: Use this to measure your jets accurately before and after drilling.
Having these tools on hand makes your work smoother and improves your results. Remember, investing in quality tools pays off in getting the right jet sizes for peak performance.
Jet Drilling Technique
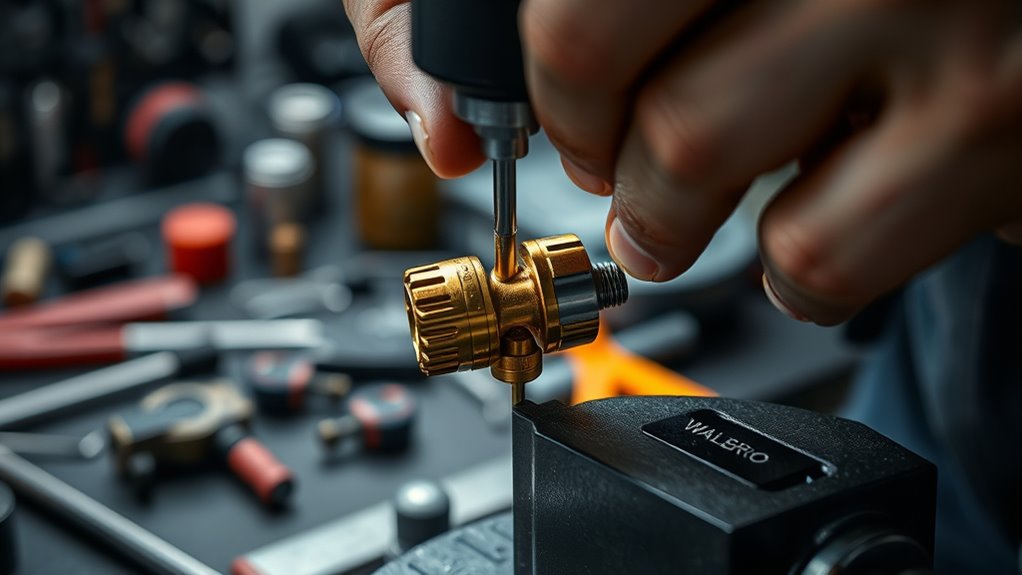
Drill your Walbro carburetor jets with precision by following these straightforward steps. First, secure the jet in a vice to prevent movement. Choose the right drill bit size based on your desired jet flow.
Start with a smaller bit to make a pilot hole, which helps ensure accuracy. Then, gradually switch to the final bit size, applying steady pressure and keeping the drill straight. Use a lubricant to prevent overheating and get cleaner cuts.
After drilling, clean the jet thoroughly to remove any debris. Finally, reassemble the carburetor and test it to check peak performance. Mastering these drilling techniques can improve jet flow and fine-tune your engine’s efficiency, giving you the edge you need.
Avoid These Common Drilling Mistakes
While drilling your Walbro carburetor jets can boost performance, it’s important to avoid common mistakes that could lead to costly damage. Pay close attention to drilling alignment because misalignment can harm the jet material and hurt how it performs.
Here are some pitfalls to watch out for:
- Incorrect Drill Size: Using the wrong bit can ruin your jets and cause poor fuel flow.
- Inconsistent Pressure: Applying uneven pressure can make the drill wobble, which can damage the jet.
- Neglecting Cleanliness: Dirt and debris can contaminate the jets and negatively impact engine performance.
How to Test Your Engine’s Performance Post-Drilling
Once you’ve drilled your Walbro carburetor jets, testing your engine’s performance is key to making sure everything’s working perfectly. Start by doing some performance diagnostics to see how your engine responds.
Kick things off with a cold start and listen for any strange or irregular sounds, which could indicate issues. Then, take the engine for a short drive or run it under load.
Pay attention to how smoothly it accelerates; good throttle response means your tuning is on point. If you notice stuttering or hesitation, you might need to make some further adjustments.
Keep an eye on the engine temperature and exhaust emissions during your tests. High temps or lots of smoke can point to fuel delivery problems.
Finally, compare your current results with the performance metrics before drilling. This helps you see if your tuning has improved the engine’s overall performance.
Adjusting Air-Fuel Ratios for Optimal Performance
To get the best performance from your engine, adjusting the air-fuel ratio is key. It directly impacts how efficiently your engine burns fuel and how much power it produces.
Proper tuning can make your engine run smoother and more efficiently. Keep an eye on your RPMs to make sure they stay in a good range when you’re making adjustments.
Check the exhaust color: a light tan or gray usually means the mixture is good, while black indicates too much fuel and white means too much air.
Make small tweaks and test how your engine responds. This feedback helps you fine-tune for optimal performance.
What to Do If Performance Isn’t Improved?
If you’re not seeing any improvement in your engine’s performance after adjusting the air-fuel ratio, it’s time to dig deeper into potential issues. Start by checking for vacuum leaks, since even small leaks can throw off your tuning efforts.
Next, verify that your jets are clean and properly sized. Dirt or incorrect sizes can hinder performance. Consider revisiting your jet tuning process, maybe adjusting the needle position or trying different jet sizes for the best results.
Don’t forget to examine other components, like the spark plug and exhaust system, as they can also affect engine efficiency. If you’re still struggling, talk to experienced tuners or check out forums.
They might offer insights specific to your setup that you haven’t considered. Staying persistent and methodical will help you get closer to the performance you want.
Frequently Asked Questions
Can I Drill Jets on Other Carburetor Brands?
Yes, you can drill jets on other carburetor brands, but you should be careful. Jet tuning is important for getting the best performance and fuel efficiency.
Every brand has different designs, so make sure you understand your specific carburetor’s needs before you start drilling. Proper maintenance is key to avoid damaging parts.
Start small when drilling the jets. Fine-tune gradually to get the results you want without risking the overall function of your carburetor.
How Do I Know if Drilling Is Necessary?
Did you know that optimizing jet performance can boost fuel efficiency by up to 10%?
You’ll know drilling is necessary if you’re experiencing poor acceleration, inconsistent idle, or excessive fuel consumption.
If your engine struggles to reach its full potential or runs rich, it’s a sign that the jets may need adjustment.
Always consider testing different setups before drilling to ensure you get the best balance for your specific needs.
What Are the Signs of Over-Drilled Jets?
You’ll notice signs of over-drilled jets when your engine’s performance drops and fuel efficiency takes a hit.
If your engine runs too rich, backfires, or struggles at various RPMs, those are clear clues something’s off.
You might also see fouled spark plugs or excessive carbon buildup, which point to jet issues.
Getting less power or worse mileage? It’s time to reassess your jet size.
Keeping an eye on these signs can save you both time and money.
Can I Reuse Jets After Drilling?
Yes, you can reuse jets after drilling, but it depends on a few factors. If your drilling techniques didn’t damage the jet’s integrity, you might keep decent performance.
Just keep an eye on how they perform over time; signs of wear could mean it’s time to replace them. Before reusing those jets, carefully check their condition.
You don’t want to risk your engine’s efficiency, right? It’s always best to be cautious and ensure your jets are in good shape before putting them back in.
Is There a Specific Drill Bit Size for Walbro Jets?
Yes, there’s a specific drill bit size for Walbro jets, usually around 0.030 inches for the best results. Using the right jet size is important because it can really affect your engine’s performance.
If you pick a drill bit that’s too big, it can mess up the fuel flow, leading to poor combustion and efficiency problems. Always double-check your measurements before drilling to keep everything running smoothly and get the best performance from your engine.
Conclusion
By now, you’ve revealed the secrets of drilling Walbro carburetor jets, and it’s time to put your skills to the test. Coincidentally, that engine tweak you’ve been thinking about could be just what you need for peak performance.
Remember, precision and safety are key, so take your time. If things don’t go as planned, don’t worry; every expert was once a beginner.
Immerse yourself, experiment, and enjoy the journey of enhancing your engine’s efficiency with your drilled Walbro carburetor jets!