Step-by-Step Guide to Clean Your Snow Thrower Carburetor
Dealing with a snow thrower that just won’t start can be super frustrating, especially when you’re counting on it to clear your driveway.
You’re not alone—many people struggle with carburetor issues that keep their machines from running smoothly. Luckily, cleaning your snow thrower carburetor is a manageable fix that can save you time and money.
If your snow thrower won’t start, cleaning the carburetor might be the solution. First, gather your tools and prepare your workspace.
Drain the fuel and disconnect the battery, then inspect parts for damage. Clean jets and passages using carburetor cleaner and compressed air.
Reassemble everything securely, making sure gaskets are intact. Regular maintenance can prevent future issues.
Stick around to uncover more tips to keep your snow thrower running smoothly.
Key Takeaways
- Regularly clean your carburetor to prevent clogs and keep your snow thrower running smoothly.
- Use fresh fuel and a stabilizer to stop gumming up the carburetor while you’re storing it.
- Before cleaning, disconnect the battery and drain the fuel tank to make the process safer.
- Check and clean the jets, passages, and other parts with carburetor cleaner and compressed air.
- When reassembling, be careful to align all parts correctly and tighten everything securely to avoid future problems.
Why Your Snow Thrower Won’t Start: Carburetor Issues
If your snow thrower won’t start, carburetor issues might be the culprit. A clogged or dirty carburetor can prevent fuel from reaching the engine, which is really frustrating when you need your machine most. Regular carburetor maintenance is key for top performance.
Check for any buildup or debris that could block fuel flow. Old or contaminated fuel can also gum up the carburetor and affect how well it works. Always use fresh fuel and think about adding a fuel stabilizer if you store your snow thrower for a while.
Make sure the air filter is clean too, since a blocked filter can starve the carburetor of air. By keeping an eye on these parts, you’ll boost your snow thrower’s reliability and make those winter chores much easier. Don’t wait for it to break down—stay proactive with your maintenance!
Signs of a Clogged Carburetor
If your snow thrower is having a hard time starting up or it’s running unevenly, that’s a good sign you should take a look at the carburetor. Sometimes, it might even leak fuel, which is definitely another clear indicator that there’s a clog or some kind of problem.
Paying attention to these signs early on can really save you from bigger headaches later on. It’s always better to catch these issues early so you can fix them before they turn into more serious, costly repairs.
Difficulty Starting Engine
When your snow thrower struggles to start, it often points to a clogged carburetor. You might notice starting problems that seem to get worse over time.
If you turn the key and hear only clicking or the engine sputters but won’t catch, it’s a sign that fuel isn’t reaching the engine properly. During engine troubleshooting, check the fuel lines and make sure they’re clear.
But focus on the carburetor because it plays a vital role in mixing air and fuel. If it’s dirty or blocked, the engine can’t get the right mixture for combustion.
Cleaning the carburetor can fix these starting issues and get your snow thrower back in action for those winter jobs. Don’t let a clogged carburetor slow you down!
Uneven Engine Performance
Struggling to start your snow thrower can cause bigger issues, like uneven engine performance. If your engine sputters or stalls, it’s time to check your carburetor. Poor fuel quality is often the culprit, and regular tuning can help restore its full power.
Here’s a quick reference table to spot signs of uneven engine performance:
| Sign | Description | Possible Solution |
|---|---|---|
| Sputtering | Engine hesitates during use | Clean or tune carburetor |
| Stalling | Engine stops suddenly | Check fuel quality |
| Rough Idling | Engine shakes while idling | Adjust carburetor settings |
| Poor Acceleration | Slow response when increasing speed | Inspect fuel lines |
| Excessive Vibration | Noticeable shaking during operation | Balance engine components |
Address these issues quickly to keep your snow thrower running smoothly.
Fuel Leakage Issues
Fuel leakage can be a big warning sign that your snow thrower’s carburetor is clogged. If you see fuel pooling around the engine or dripping from the fuel line, it’s time to check things out.
This leak usually means the carburetor isn’t mixing fuel and air properly, often because dirt or debris is blocking the pathways. Before adjusting the carburetor, take a look at the fuel line for cracks or damage, since those can also cause leaks.
If the fuel line looks good, go ahead and clean the carburetor thoroughly. Removing any blockages can restore proper fuel flow and help prevent leaks in the future. Regular maintenance keeps your snow thrower running smoothly and ready for winter weather.
Why a Clean Carburetor Is Crucial for Your Snow Thrower
A clean carburetor is essential for your snow thrower’s performance and longevity. When you keep the carburetor well-maintained, it guarantees the engine runs smoothly and efficiently. Built-up dirt and debris can hinder fuel flow, leading to poor performance. This means your snow thrower might struggle to start or run unevenly, making snow removal frustrating.
Regular carburetor maintenance not only improves performance but also extends the life of your machine. A clean carburetor helps maintain the correct air-fuel mixture, allowing for better combustion and less wear on engine parts. By addressing these issues early, you can avoid costly repairs later on.
In short, a clean carburetor keeps your snow thrower working at its best. This ensures you’re ready to tackle winter’s worst with confidence and efficiency. Don’t underestimate how much a well-maintained carburetor impacts your snow thrower’s overall performance.
Gather Essential Tools for the Job
To guarantee your snow thrower runs smoothly, you’ll need the right tools for cleaning the carburetor. Start by gathering a set of essential tools that will make the job easier and more efficient. You’ll need a socket wrench or screwdriver to remove the carburetor from the engine.
A clean, flat workspace is fundamental, so have a workbench or table ready. Next, grab some carburetor cleaner, which is crucial for dissolving buildup and grime. A soft brush or cloth will help you scrub hard-to-reach areas.
Don’t forget a container for any small parts you’ll remove during the process—this keeps everything organized. Finally, safety goggles and gloves are important for protecting yourself during carburetor cleaning. With these essential tools at hand, you’re set to tackle the task ahead and guarantee your snow thrower performs at its best.
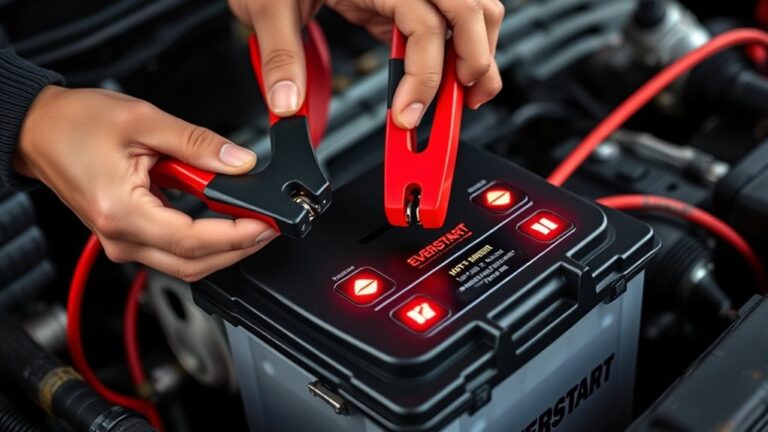
Prepare Your Snow Thrower for Cleaning
Before you start cleaning your snow thrower’s carburetor, make sure it’s properly prepared. Gather all the cleaning supplies you’ll need and inspect your snow thrower for any issues.
A clean workspace makes the job easier and helps prevent you from losing small parts during the process. Here’s a quick checklist to help you get ready:
| Step | Action |
|---|---|
| 1. Fuel | Drain the fuel tank |
| 2. Battery | Disconnect the battery |
| 3. Workspace | Clear a designated area |
| 4. Tools | Lay out your tools for easy access |
| 5. Safety Gear | Wear gloves and goggles |
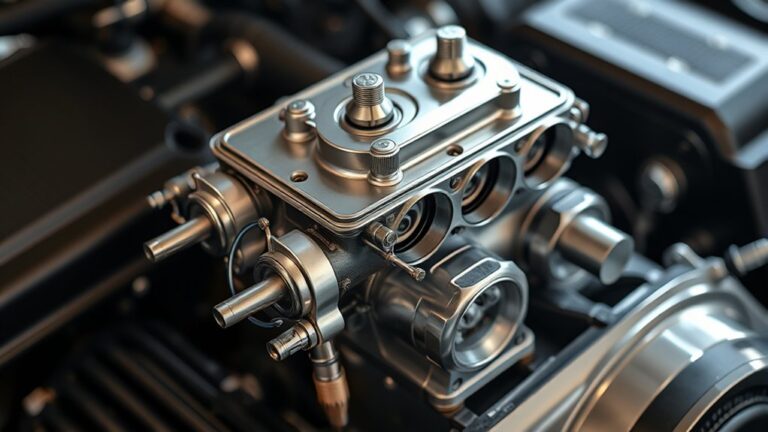
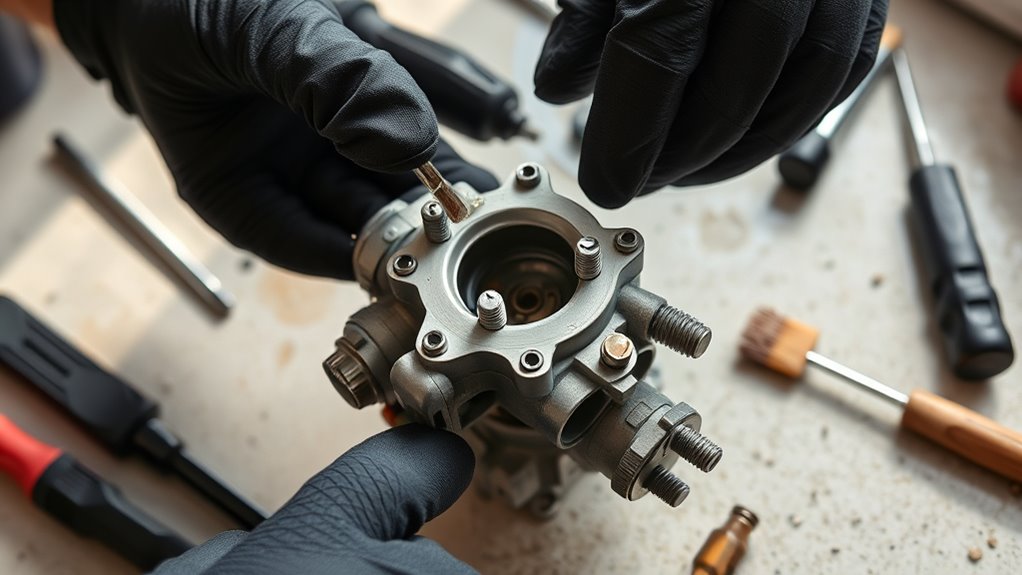
Disassemble the Carburetor Safely
Carefully disassembling the carburetor is key to cleaning it properly. Start by making sure your workspace is clean and organized. Wear gloves and safety goggles to keep yourself safe.
Before you start, take a few pictures of how everything is set up. This will help you remember how to put it back together later.
Use a socket wrench to carefully remove the screws holding the carburetor to the engine. Pay attention to the order of disassembly, and keep screws and small parts in labeled containers.
Gently pull the carburetor away from the engine, avoiding any force that could damage the connections. Once it’s loose, remove the float bowl and other parts carefully.
Handle each piece gently because they can be fragile. Following these steps ensures a safe and effective disassembly, setting you up for a thorough cleaning.
Check Carburetor Parts for Damage
Now that you’ve taken apart the carburetor, it’s a good idea to check all the parts for any damage. Take a close look at the gaskets and seals—if they’re worn out or cracked, they might cause leaks or poor performance.
Next, examine the float and needle to make sure they move and function properly. If they’re sticking or damaged, it could mess with the fuel flow. Also, don’t forget to check the jets and passages for any clogs or debris. Clear passages are essential to keep everything running smoothly.
Making sure these parts are in good shape is really important for your carburetor to work at its best.
Inspect Gaskets And Seals
When inspecting your snow thrower’s carburetor, it’s important to check the gaskets and seals because they help maintain proper fuel flow. Start by carefully inspecting the seals for cracks, wear, or any damage.
A damaged seal can cause air leaks, which can hurt your engine’s performance. Then, look at the gaskets for similar issues. If you see any deterioration, it’s time to replace them.
Make sure to pick the right size and type for your model. Properly installed gaskets and seals will prevent leaks and keep your engine running smoothly.
Don’t skip this step — it can save you from future headaches and costly repairs. Keep your snow thrower in top shape this winter!
Examine Float And Needle
Inspect the float and needle in your carburetor to make sure they’re in good shape. Start with a thorough float check—look for cracks, warping, or any signs of damage. A damaged float can cause fuel leaks, which will mess with your snow thrower’s performance.
Next, check the needle. Make sure it moves freely and sits properly when the float is in place. If it’s stuck or misaligned, you might need to adjust it for best performance. Gently clean the needle and its seat to remove any debris or buildup.
If either part shows significant wear, think about replacing them. Keeping the float and needle in good condition is key for smooth fuel flow and overall efficiency.
Check Jets And Passages
Before you dive into cleaning, it’s important to check the jets and passages in your carburetor for any damage. Start with a thorough inspection—look for blockages or buildup that could block fuel flow. Use compressed air to blow out debris and make sure everything’s clear.
Next, focus on cleaning the jets. Remove them and look closely for cracks or signs of wear. If they’re clogged, soak them in carburetor cleaner and use a small brush to scrub away residue.
Check all parts for corrosion or deterioration. Replacing damaged components now can save you headaches later. Once everything looks good, you’re ready to move on with the cleaning process.
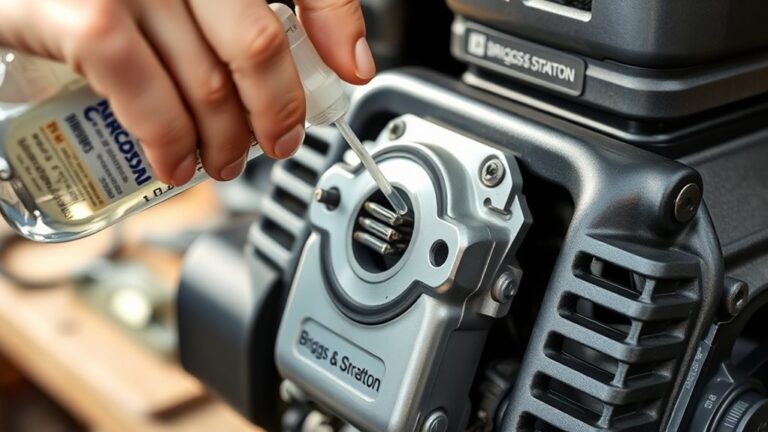
Clean Carburetor Components Thoroughly
To guarantee your snow thrower runs smoothly, you need to clean the carburetor components thoroughly. Start by using a carburetor cleaner spray, which efficiently breaks down grime and deposits. Focus on the float bowl, needle valve, and jets; these areas often collect dirt that can impact performance.
Remove any remaining fuel and disassemble the components carefully. As you clean, use a soft brush or cloth to scrub away stubborn residues. Don’t forget to inspect the gaskets and O-rings; replacing them if they’re damaged can improve your maintenance techniques.
After cleaning, verify all passages are clear by blowing air through them. This step is essential, as any blockage can hinder fuel flow. Finally, let the components dry completely before moving on to reassembly. Proper carburetor cleaning not only boosts efficiency but also extends the life of your snow thrower.
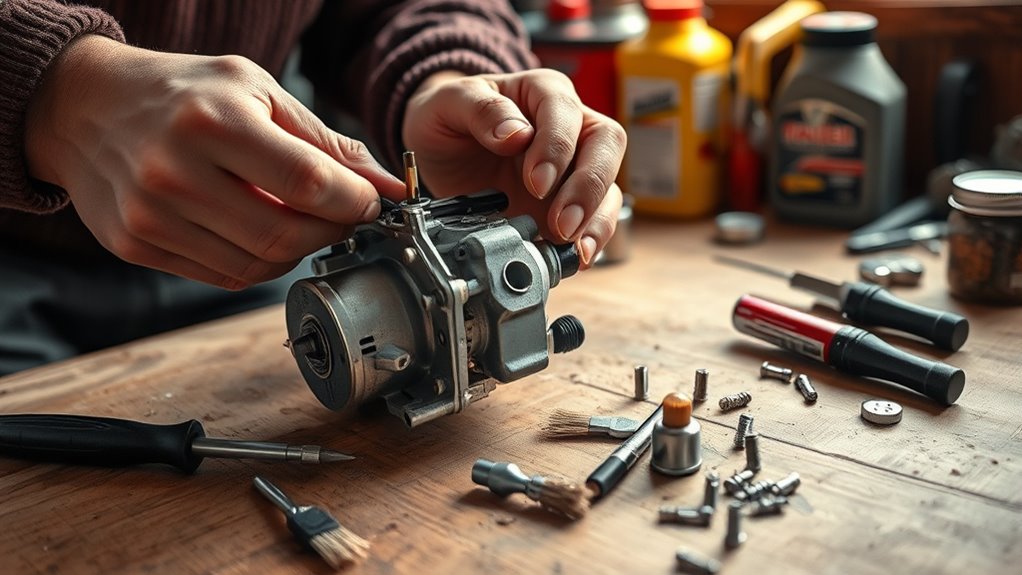
Reassemble the Carburetor Correctly
Now that you’ve cleaned all the carburetor parts, it’s time to put everything back together the right way. Just take your time and make sure all the pieces are aligned properly—that way, you’ll avoid any mishaps down the line.
And don’t forget to tighten those fasteners securely. A snug fit is key to making sure everything works smoothly and doesn’t come loose when you’re using the engine.
Aligning All Components Properly
As you reassemble the carburetor, it’s important to make sure all components are properly aligned for optimal performance. Getting everything in the right place now will help your snow thrower run smoothly later.
Check each part carefully: the float should move freely up and down, and the needle valve needs to be above the float to seal correctly. Make sure the gasket is not pinched between parts, and that the throttle plate opens fully.
Ensure the jets are securely in place and free of obstructions. Take your time positioning each component properly. If needed, refer to your manual for specific details. Proper alignment now saves you trouble down the line.
Secure Fasteners Firmly
Secure the fasteners firmly to ensure your carburetor stays intact during operation. When reassembling, pay attention to the different fastener types—such as screws, bolts, and nuts—used in your carburetor. Each type may require specific torque specifications, so check your manual for the right measurements.
Be careful not to over-tighten, as this can damage components, or under-tighten, which might cause leaks or malfunctions. Use a torque wrench to apply the correct amount of pressure. Once everything is secured, double-check for any loose parts.
Doing this extra check can save you headaches later when your snow thrower is in action. With everything locked in place, you’re ready to handle the snow with confidence.
Routine Maintenance Tips to Keep Your Carburetor Clean
To keep your snow thrower performing at its best, regular maintenance of the carburetor is essential. Start by checking the fuel system for any leaks or debris. Using high-quality fuel helps prevent gunk build-up, making carburetor maintenance easier. When you store your snow thrower, consider using a fuel stabilizer to keep the fuel fresh and clean.
Every few uses, clean the air filter to guarantee proper airflow. A dirty filter can lead to inefficient combustion and affect performance. Moreover, use simple cleaning techniques, like spraying carburetor cleaner into the jets and passages, to remove any stubborn deposits. Don’t forget to inspect the gaskets for wear and replace them if necessary.
Lastly, always consult your owner’s manual for specific maintenance recommendations. By following these tips, you’ll keep your carburetor in top shape, ensuring your snow thrower runs smoothly all winter long.
Frequently Asked Questions
How Often Should I Clean My Snow Thrower Carburetor?
You should clean your snow thrower carburetor at least once a season to keep your engine running smoothly.
If you use it a lot or notice it’s having trouble starting, you might want to do it more often.
Regular maintenance helps stop buildup that can block fuel flow and make your machine less efficient.
Keeping it clean not only boosts performance but also helps your snow thrower last longer.
That way, it’ll be ready to go whenever you need it most.
Can I Use Water to Clean the Carburetor?
Using water to clean your carburetor? That’s like trying to wash your car with a garden hose during a thunderstorm! You’ll want to avoid that. Instead, stick to effective cleaning solvents for proper carburetor maintenance.
Options like carburetor cleaner or brake cleaner work wonders. They’ll dissolve gunk without leaving you with a soggy mess. Remember, a clean carburetor means better performance, so choose wisely for the best results!
What Safety Gear Should I Wear While Cleaning?
When you’re cleaning your carburetor, it’s important to wear the right safety gear. Start with protective eyewear to shield your eyes from debris or cleaning supplies.
You should also consider gloves to protect your hands from chemicals and sharp edges. Wearing a mask can help you avoid inhaling fumes.
Finally, wearing sturdy clothing is a good idea to protect your skin from potential splashes. Safety first guarantees a smooth cleaning process!
Is It Necessary to Replace Gaskets During Cleaning?
Yes, it’s often necessary to replace gaskets during cleaning. Think of gaskets like the seals on a jar; if they’re worn or damaged, they won’t keep things tight.
Different gasket types can affect your snow thrower’s performance. While cleaning, inspect the gaskets closely.
If you see any cracks or wear, go ahead and replace them. This ensures a proper seal and peak function.
Replacing gaskets now can save you trouble later!
Can I Clean the Carburetor Without Disassembling It?
You can clean the carburetor without taking it apart, but it might not be as effective. Using the right cleaning solutions to break down gunk and debris is a good start.
Spray the cleaner into the carburetor while the engine is running, but be careful. It might not reach every small nook and cranny on its own.
If problems keep happening, it’s a good idea to disassemble the carburetor for a deep clean and checkup. Regular maintenance will help keep your engine running smoothly.
Conclusion
Now that you’ve cleaned your snow thrower’s carburetor, picture the first snowfall. You’re outside, the crisp air biting at your cheeks, and your machine roars to life—smooth and powerful.
Will it effortlessly clear the driveway, or will you be left struggling with another stubborn engine? With your newfound skills and a little routine maintenance, you hold the key to winter readiness.
Just imagine the satisfaction of a job well done as the snow flies behind you. Properly maintaining your snow thrower carburetor ensures it’s always ready when you need it most.