7 Essential Steps to Rebuild Your Carburetor
Are you tired of dealing with engine trouble or poor performance? You’re not alone—many people struggle with carburetor issues that can be tricky to fix on their own.
Luckily, rebuilding your carburetor can breathe new life into your engine and save you money on repairs.
To successfully rebuild your carburetor, start by diagnosing common issues like fuel flow and air leaks. Gather essential tools and supplies, then carefully disassemble the carburetor, keeping parts organized.
Clean all components thoroughly using solvents or ultrasonic cleaners. Replace any worn parts, making sure they’re compatible.
Reassemble the carburetor, double-checking connections, and test it for peak performance. Fine-tune adjustments as needed to achieve smooth operation.
Continue on for more detailed tips and insights!
Key Takeaways
- Gather the necessary tools and carburetor kits, making sure your workspace is clean before you start the rebuild process.
- Carefully take apart the carburetor, labeling parts and connections to make reassembly easier.
- Clean all components with the right solvents and tools, checking for wear or damage as you go.
- Replace any worn parts with quality replacements, ensuring they fit properly and are installed correctly.
- Reassemble the carburetor, double-checking all connections and settings before testing the engine and making any needed adjustments.
Common Carburetor Issues to Diagnose First
When your engine struggles to start or runs unevenly, it’s important to diagnose common carburetor issues first. Start by checking the fuel flow; a clogged fuel line or filter could be the problem.
Next, take a look at the air intake. Proper airflow is essential for good throttle response. If performance feels sluggish, you might need to adjust the adjustment screws for a better fuel-air mix.
Proper airflow is crucial for optimal throttle response; adjusting the screws may enhance your engine’s performance.
Don’t forget to inspect the gaskets. Worn or damaged gaskets can cause air leaks, which lead to performance problems. Vacuum leaks can also mess up the air-fuel mixture and cause rough idling.
Finally, check the idle settings. If they’re off, your engine could have trouble maintaining a steady RPM. By systematically examining these parts, you can identify and fix the core issues with your carburetor, leading to smoother performance and more reliability.
Essential Tools and Supplies for Carburetor Rebuilding
After diagnosing common carburetor issues, you’ll want to gather the right tools and supplies for rebuilding. Having everything ready will make the process smoother and help you focus on perfecting the fuel mixture and restoring your carburetor.
Here’s a quick list of essential tools and supplies:
- Carburetor kits: These usually include gaskets, jets, and other necessary parts.
- Screwdrivers and wrenches: You’ll need different sizes for various screws and bolts.
- Cleaning supplies: Use carburetor cleaner and brushes to clear away debris and buildup.
- Measuring tools: Make sure you have a gauge to check the fuel mixture and other specs.
With these essentials at your side, you’re ready to tackle the rebuild confidently. Remember, a well-organized workspace makes all the difference!
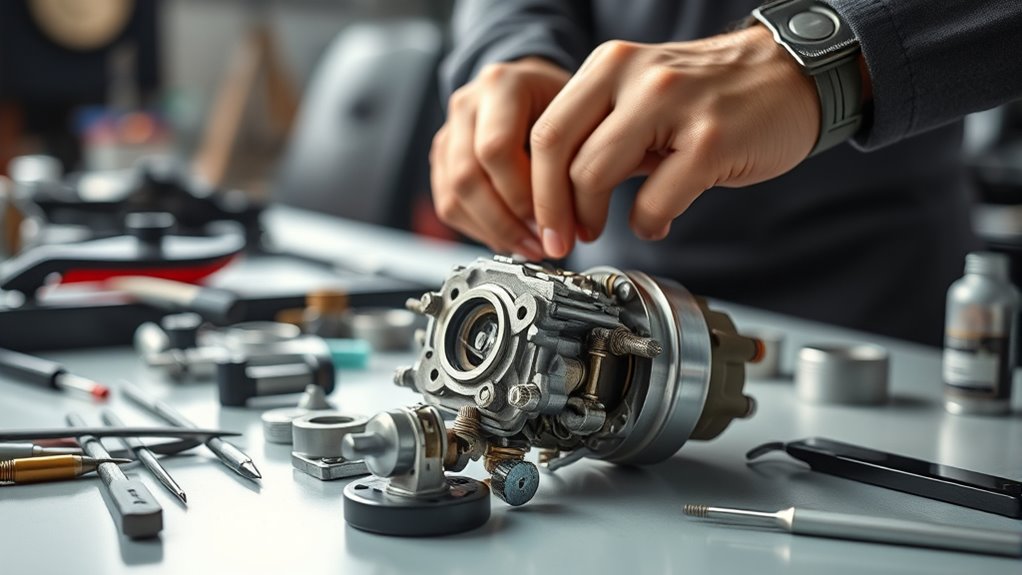
Disassemble the Carburetor Carefully
Start by carefully removing the carburetor from your engine, paying attention to how everything is connected. Use disassembly techniques like labeling wires and bolts to help remember their original positions.
As you work, make sure you’re wearing safety goggles and gloves to protect yourself from chemicals or debris. Once you’ve got the carburetor off, place it on a clean, well-lit workspace.
Use a soft cloth to catch any fuel that might spill and avoid damaging sensitive parts. As you disassemble, keep track of small pieces like screws and gaskets by placing them in labeled containers.
Be gentle with delicate pieces and avoid forcing any components apart. Pay attention to the order of disassembly so reassembly will be easier. Taking safety precautions and using good disassembly techniques will help ensure a successful rebuild.
Best Practices for Cleaning Carburetor Components
Once you’ve disassembled the carburetor, cleaning its components is essential for top performance. Start with suitable cleaning solutions, like carburetor solvents, to clear away grime and buildup. Ultrasonic cleaners can give a thorough cleaning, especially for delicate parts like air passages.
Here are some best practices to keep in mind:
- Safety Precautions: Always wear gloves and goggles to protect yourself from harmful chemicals.
- Detailed Scrubbing: Use a soft brush to scrub manually, paying attention to hard-to-reach spots.
- Visual Inspections: Check for signs of wear or corrosion as you clean to help preserve the parts.
- Gasket Maintenance: Carefully replace or clean gaskets to prevent leaks.
Replace Worn or Damaged Parts
When you’re rebuilding your carburetor, it’s really important to check for any worn-out or damaged parts. These little issues can seriously impact how well your engine runs, so taking the time to spot them is worth it.
Once you’ve identified the problem parts, make sure to get replacements that are high quality. Using good parts will help ensure everything works smoothly and lasts longer. And don’t forget, installing them properly is just as important—taking your time with the process will pay off in the long run.
Identify Worn Components
Identifying worn components in your carburetor is key to restoring its performance. When you notice certain symptoms, it’s important to pinpoint what’s causing the issue.
Look for these signs to help you assess the condition:
- Cracked or brittle gaskets can lead to air leaks and poor fuel delivery.
- A worn needle and seat might cause flooding or fuel starvation.
- Damaged floats can disrupt fuel levels and affect how the engine runs.
- Corroded jets and passages can become blocked, severely reducing performance.
Source Quality Replacements
Finding quality replacements for worn or damaged parts is essential for restoring your carburetor’s performance. Start by researching reputable carburetor brands known for reliability and durability. Look for parts that are compatible with your specific model, as this guarantees peak function.
Use effective sourcing techniques like checking online marketplaces, local auto parts stores, and specialized shops. Reading customer reviews can help you gauge the quality of the replacements.
Joining forums or online communities where fellow enthusiasts share their experiences can also be helpful. Networking with others can lead to valuable insights on where to find the best parts.
Proper Installation Techniques
Before you start the installation, gather all your tools and make sure you have everything you need nearby. Properly replacing worn or damaged parts is key to your carburetor’s performance.
Here are some tips to help you get it right:
Check all parts for damage before you begin. This way, you can replace any components that aren’t in good shape.
Use alignment techniques to ensure each piece fits correctly. It’ll save you time and prevent issues down the line.
Tighten bolts evenly to avoid warping or leaks. Take your time and go gradually around each bolt.
Finally, double-check all connections to make sure they’re sealed properly and working as they should.
Reassemble the Carburetor Carefully
Before you dive into reassembling your carburetor, make sure you have all the tools you’ll need. It’s a good idea to lay everything out beforehand so the process goes smoothly without any interruptions.
Just remember, it’s really important to follow the manufacturer’s instructions carefully. That way, you can avoid making any mistakes that could cause problems later on.
And don’t forget to double-check all the connections once you’re done. Make sure everything is tight and secure, and that the carburetor is working properly before you finish up.
Gather Necessary Tools First
To successfully reassemble your carburetor, having the right tools is key. Organizing them properly makes the process smoother and helps you avoid missing any steps.
Here’s what you’ll need to cover the basics effectively:
- Screwdrivers (flathead and Phillips)
- Wrenches (various sizes)
- Pliers (needle-nose preferred)
- Cleaning brushes (for intricate parts)
Having these tools ready lets you focus on reassembly without searching for what you need. Keep everything in a toolbox or designated area to avoid confusion. This prep saves time and helps you appreciate the carburetor’s details, leading to an easier reassembly.
Follow Manufacturer’s Guidelines Precisely
Following the manufacturer’s guidelines is vital as you reassemble your carburetor. These instructions provide specific carburetor specifications that guarantee peak performance and longevity.
Start by carefully aligning all components according to the factory settings, paying close attention to any torque requirements specified in the manual. Use the correct gaskets and seals to prevent leaks, and don’t skip any steps, even if they seem minor.
Each piece plays an important role in the overall function of the carburetor. As you work, make certain to maintain a clean environment to avoid contamination.
Double-Check All Connections
After you’ve aligned all components according to the factory settings, it’s time to double-check all connections. Making sure each one is secure is key for top performance. Keep an eye on different connection types and sealing methods during this step.
Verify that all screws are tightened to the manufacturer’s specifications. Check rubber gaskets for proper placement and integrity. Make sure fuel lines are firmly attached and free from leaks.
Inspect electronic connectors for secure fittings and look for any signs of corrosion. Taking these extra steps helps ensure everything runs smoothly and safely.
Rebuilding: Testing and Fine-Tuning Your Carburetor
Testing and fine-tuning your carburetor is essential for peak engine performance. Start by checking your fuel mixture; it should be balanced for ideal combustion. If you notice rough idling or stalling, it’s time to adjust the idle settings.
Use a tachometer to find the perfect RPM, then tweak the idle adjustment screw until the engine runs smoothly. After making adjustments, take your vehicle for a test drive. Pay attention to how it accelerates and responds during different speeds.
If you experience hesitation or backfiring, revisit your fuel mixture settings. Fine-tuning may require several tries, so don’t rush the process. Always note any changes you make, as this helps you understand what works best for your engine.
With patience and careful adjustments, you’ll improve performance and ensure your carburetor operates at its best. Happy tuning!
Frequently Asked Questions
How Do I Know if My Carburetor Needs Rebuilding?
You’ll know your carburetor needs rebuilding if you notice specific symptoms. Look for performance issues like rough idling, stalling, or difficulty starting your engine.
If your vehicle struggles with acceleration or you see black smoke from the exhaust, that’s a clear sign.
Moreover, if you experience frequent fuel leaks or poor fuel economy, it’s time to evaluate a rebuild.
Trust your instincts; these symptoms often indicate deeper carburetor problems.
Can I Rebuild a Carburetor Without Professional Help?
Yes, you can absolutely rebuild a carburetor without professional help! With the right DIY techniques, you’ll find it’s totally doable.
Just make sure to do some research on common rebuilding mistakes so you can avoid pitfalls. Gather your tools, take your time, and follow a reliable guide.
You might even find that it’s a rewarding project. Stay patient, and don’t hesitate to ask for advice if you get stuck along the way!
What Are the Signs of a Poorly Rebuilt Carburetor?
If your carburetor’s acting like a rusty old engine in a junkyard, you’ve got some signs to watch for. Common carburetor symptoms include performance issues like stalling or rough idling.
You might also notice fuel leaks that create a mess or tuning challenges that drive you nuts. Airflow restrictions affecting throttle response can be another red flag.
Gasket failures that lead to poor efficiency are also common. Keep an eye out for these issues to avoid further headaches!
How Often Should I Rebuild My Carburetor?
You should rebuild your carburetor every two to five years, depending on how you use your vehicle and the conditions it’s exposed to.
Regular maintenance is key to keeping your engine running smoothly. If you notice performance issues or your fuel efficiency drops, it might be time to rebuild sooner.
Staying on top of this can prevent bigger problems later on, saving you time and money in the long run.
Are There Specific Tools for Different Carburetor Types?
Yes, there are specific tools for different carburetor types. When you’re working on a Holley, you’ll need a float gauge. For a Rochester, a tuning screwdriver is essential.
Each carburetor type has its own unique tool requirements that make the job easier and more efficient. By gathering the right tools, you’ll ensure precision and streamline your process.
This also helps you avoid frustrations and mistakes. So, make sure to check your carburetor type and gather what you need before diving in!
Conclusion
Rebuilding your carburetor can breathe new life into your engine, and you’ll be glad to know that nearly 70% of carburetor problems come from dirt and debris.
By following these seven essential steps, you can address common issues, boost performance, and save money on repairs.
Don’t forget the satisfaction of a job well done—your engine will thank you for it.
So grab your tools and get started; your ride is waiting for a much-needed boost with a rebuilt carburetor!