7 Steps to Fix Your 7-Speed Bicycle Gear Shifter
Many bike enthusiasts know the frustration of a malfunctioning 7-speed bicycle gear shifter. It’s common to struggle with gears not shifting smoothly or hearing annoying grinding noises. You’re not alone—these issues can really put a damper on your ride.
To fix your 7-speed bicycle gear shifter, start by identifying symptoms like grinding noises or skipping gears. Gather essential tools like a multi-tool and needle-nose pliers.
Inspect cables and housing for damage, then adjust the cable tension. Align the derailleur for smooth shifting and test its functionality.
If issues persist, troubleshoot further by checking for misalignments or frayed cables. You’ll find more detailed steps and solutions to improve your bike’s performance ahead.
Key Takeaways
- Inspect cables and housing for fraying, rust, or kinks to keep your shifting smooth and reliable.
- Adjust the derailleur and limit screws for proper alignment and responsive gear changes.
- Check cable tension and realign if needed to prevent skipping or grinding noises.
- Clean and lubricate the shifter mechanism regularly to stop dirt buildup and keep everything working smoothly.
- If problems still happen, it’s a good idea to ask a professional for help with more complex issues beyond basic tweaks.
Identify Symptoms of a Malfunctioning Gear Shifter
When your bike struggles to shift gears smoothly, it’s time to check the gear shifter. Watch out for grinding noises or sudden jumps between gears—that’s a clear sign something’s wrong. You might also notice the chain skipping or not engaging properly, which can be pretty frustrating during a ride.
Another common problem is the shifter feeling sticky or unresponsive. If you’re pushing the lever and nothing happens, it’s probably an issue with the cable tension or the shifter itself. Also, keep an eye out for frayed cables or loose connections—you’ll want to fix those right away.
Spotting these symptoms early can save you a lot of trouble later on. Regularly checking your gear shifting helps keep your bike running smoothly and makes for a better ride.
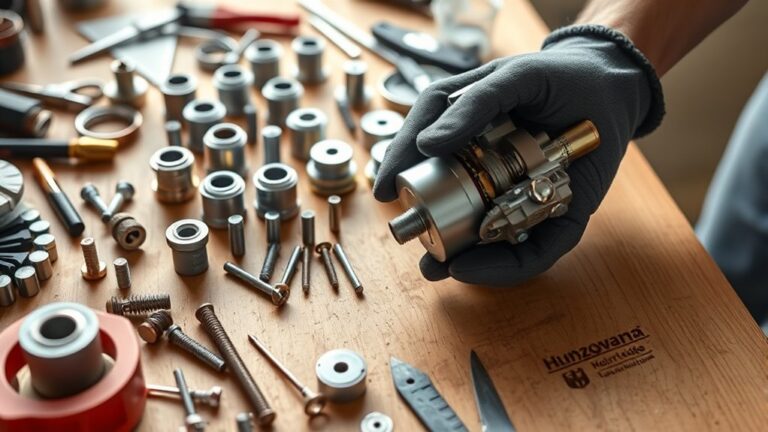
Gather Essential Tools for Repairs
Before you dive into fixing your 7-speed bicycle gear shifter, it’s a good idea to gather all the essential tools first. Having everything you need on hand will make the repair process much easier and more straightforward. Plus, knowing what tools are required can help you avoid any unnecessary trips to the store in the middle of your repair.
It’s also worth thinking about safety equipment and any optional accessories that could make the job safer and more comfortable. With everything ready, you’ll be able to get your bike back in shape without a hitch. So, let’s go over what tools you’ll need to get started on that gear shifter repair.
Required Tools Overview
To successfully fix your 7-speed bicycle gear shifter, you’ll need a few essential tools at your side. Start by gathering a multi-tool with various screwdriver heads, as different shifter types might require specific sizes.
A pair of needle-nose pliers will help you manage cables effectively, while a chain tool is vital for any chain adjustments. Don’t forget a clean cloth for maintenance tips and to keep your workspace tidy.
If you have a torque wrench, it can guarantee bolts are tightened to the correct specifications, preventing future issues. Having these tools ready will make your repair process smoother and more efficient, so you can get back to riding without hassle.
Safety Equipment Necessities
While gathering your tools for fixing the 7-speed bicycle gear shifter, it’s just as important to think about your safety gear. Start with a good-quality helmet—helmet safety isn’t optional when you’re working on your bike. Accidents can happen, and protecting your head should always come first.
Next, think about wearing reflective gear. This isn’t just for riding; it helps ensure you’re visible to others if you’re working outside and something goes wrong. Make sure your clothes are comfortable and won’t catch on any tools.
Finally, don’t forget safety goggles to keep debris out of your eyes. With the right safety equipment, you can focus on the task at hand, knowing you’re taking the proper precautions.
Optional Accessories List
As you prepare to fix your 7-speed bicycle gear shifter, gathering the right tools can make a big difference in how easy and quick your repairs are. Start by collecting essential maintenance tools like a multi-tool, which includes screwdrivers and wrenches, to handle various adjustments.
A chain tool is also handy for any replacements you might need. Think about investing in gear shifter accessories like cable cutters and lubricant to keep everything running smoothly. A repair stand can lift your bike, making it easier to work on, and gloves will protect your hands during the process.
Having a clean cloth nearby is useful for wiping down parts and keeping things tidy. With these tools and accessories, you’ll be well-prepared to tackle any gear shifter issues effectively.
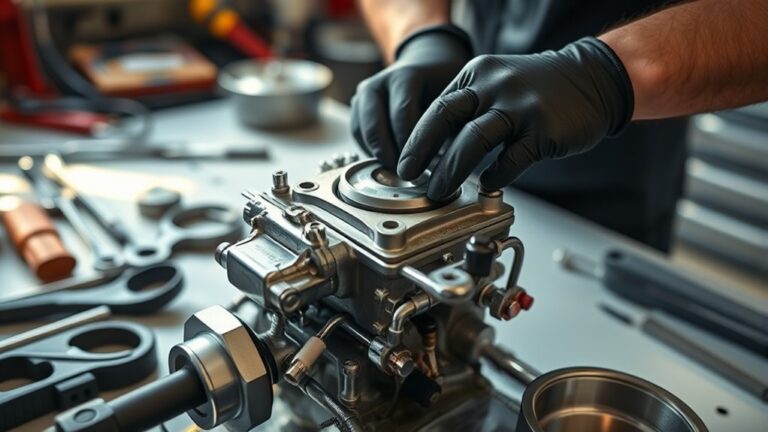
Check for Damage in Cables and Housing
Before you start fixing your 7-speed bicycle gear shifter, it’s important to check for damage in the cables and housing. A quick inspection can save you time and frustration down the road. Here’s what to look for:
- Frayed cables: Check for any signs of wear or breakage.
- Rust or corrosion: Look for rust that might affect performance.
- Kinks or bends: Make sure the cables are straight and not obstructed.
- Cracked housing: Inspect the housing for cracks that could cause shifting problems.
If you find any damage, consider replacing the housing to keep shifting smooth. Regular inspections and timely replacements help your bike run at its best. This simple step ensures your gear shifter works properly, setting a solid foundation for the adjustments to come.
Adjust Cable Tension for Better Shifting
After verifying your cables and housing are in good condition, the next step is to adjust the cable tension for better shifting. If you notice sluggish or inaccurate gear changes, it might be due to cable wear or improper tension.
Start by locating the barrel adjuster on your shifter or derailleur. Turning it clockwise will increase tension, while turning it counterclockwise decreases it.
Locate the barrel adjuster on your shifter or derailleur; turn it clockwise to increase tension or counterclockwise to decrease it.
Shift through your gears and see how the bike responds. If shifting feels smooth, you’ve probably found the right tension. If not, fine-tune it further until you get that perfect feel.
Keep in mind, too much tension can cause the chain to skip, while too little can lead to missed shifts. Regularly checking and adjusting cable tension helps prolong your bike’s components and keeps everything running smoothly.
A little adjustment now can make a big difference on your rides!
Align the Derailleur for Optimal Performance
To make sure your bike shifts smoothly, you should start by checking the derailleur’s position. If it’s not aligned right, you might run into some annoying gear problems. So, take a moment to ensure it’s properly adjusted.
Also, don’t forget to tweak those limit screws. They help keep the derailleur in the right spot and make sure everything runs smoothly and efficiently.
Check Derailleur Positioning
Making sure your derailleur is properly aligned is key to smooth gear shifting and top performance. Different types might need specific alignment steps, so take a moment to check yours.
First, look at the chain. It should sit straight on the derailleur without any wobbling or misalignment. Next, inspect the derailleur hanger—it needs to be straight and not bent or bent back.
Check the limit screws to ensure they are set correctly; we’ll cover how to do that later. Finally, make sure the cable tension is just right for smooth shifting.
Adjust Limit Screws
With the derailleur properly aligned, it’s time to adjust the limit screws for peak performance. Start by locating the two limit screws on your derailleur: one for the highest gear (upper) and one for the lowest (lower).
Shift the chain to the highest gear, then turn the upper limit screw until the chain moves smoothly without overshifting. Next, shift to the lowest gear and repeat the process with the lower limit screw.
Use simple adjustment techniques: clockwise turns will limit the range, while counterclockwise turns will allow more movement. After making adjustments, test the shifting to confirm it’s crisp and responsive.
Fine-tune as necessary for the best gear changes.
Test the Shifter Functionality After Repair
After finishing your repair, it’s time to test your shifter. You want to make sure the sensitivity and gear response are just right.
Start by shifting through all the gears. Make sure each one clicks in smoothly without any hesitation.
Listen carefully for the clicks—they should be clear and distinct. If you hear grinding sounds, you’ll need to make some adjustments.
Take your bike out for a ride and shift while pedaling to see how it performs under pressure.
The gear changes should feel smooth and seamless, with no jerks or rough transitions.
If you notice any issues during these checks, it might be time to revisit your adjustments.
A well-functioning shifter can really improve your riding experience, so it’s worth getting it just right!
Troubleshooting Persistent Shifter Issues
If you’re still having trouble with your shifter, it’s time to look deeper into the issue. Start by checking for common mistakes that can slow down or hinder shifting.
Take a look at your cable tension and alignment—small misadjustments can really affect how smoothly your bike shifts.
Here are some simple maintenance tips to keep in mind:
| Issue | Solution |
|---|---|
| Cable Fraying | Replace the cable |
| Dirty Mechanism | Clean and lubricate the shifter |
| Misaligned Derailleur | Adjust the derailleur position |
Make sure you’re using the right tools for these adjustments. If your shifter still isn’t cooperating after trying these steps, it might be best to see a professional.
Regular maintenance is key to preventing issues, so don’t forget to keep your bike in top shape!
Frequently Asked Questions
How Often Should I Maintain My Bicycle Gear Shifter?
You should maintain your bicycle gear shifter every few months or whenever you notice shifting issues.
Regular gear adjustment tips can keep your ride smooth, while lubrication techniques help prevent wear.
Check for dirt build-up and apply lubricant to cables and housing as needed.
If you ride frequently, consider a monthly check-up to make sure everything’s working well.
This proactive approach saves you from bigger problems down the road!
Can Weather Affect My Gear Shifter’s Performance?
Yes, weather can definitely affect your gear shifter’s performance. Extreme temperatures like heat or cold can cause the lubricant in your gears to thicken or thin, which impacts how smoothly you shift.
It’s important to regularly check your gear lubrication, especially before drastic changes in the weather. If you notice sluggish shifts or noise, try reapplying lubricant to keep your shifter working well.
This way, your rides stay enjoyable no matter what the outside conditions are like.
What Are Common Causes of Gear Shifter Failure?
Common causes of gear shifter failure include shifter alignment issues and cable wear. If your shifter isn’t properly aligned, it can lead to inaccurate gear changes. You might notice skipping or sticking while shifting.
Worn cables can fray or stretch, reducing their effectiveness. Regularly check both components to keep everything running smoothly. Addressing these problems early can improve your bike’s performance and make rides more enjoyable.
Is It Normal for Shifters to Feel Stiff?
Yes, it’s normal for shifters to feel stiff sometimes, but it shouldn’t be a constant issue. Have you checked the cable tension? Improper tension can cause stiffness in your shifter.
You might also need to make some shifter adjustments to ensure everything’s aligned properly. Regular maintenance can help prevent stiffness and make your shifting smoother.
When Should I Replace My Gear Shifter Entirely?
You should replace your gear shifter entirely when you notice clear signs it’s time for an upgrade. This includes persistent stiffness, slipping gears, or poor shifting performance.
A typical gear shifter lasts around 5 to 10 years, but that can depend on how often you ride and how well you maintain it.
If your shifter shows signs of wear or damage, it’s best to replace it sooner rather than later. Waiting too long might cause more issues with your bike’s overall performance.
Conclusion
Fixing your 7-speed bicycle gear shifter doesn’t have to feel overwhelming.
Start by noticing any symptoms like slipping gears or difficulty shifting. Gather your tools so you’re ready to go.
Next, check for any visible damage or worn parts that could be causing issues. Adjust the tension on the shifter cable to ensure smooth operation.
Align the derailleur properly so it lines up with the gears. Once everything looks good, test your shifting to see if it’s working smoothly.
If problems stick around, don’t hesitate to troubleshoot further. Remember, maintaining your bike properly leads to better rides, smooth shifting, and more fun on the road.
So, follow these steps, stay patient, and you’ll be ready to hit the trails confidently with your 7-speed bicycle gear shifter.