How to Service Your Carburetor – A Step-by-Step Guide
Are you tired of your engine running rough or struggling to start? You’re not alone—many people struggle with carburetor issues that hinder their vehicle’s performance. Luckily, giving your carburetor a proper service can make a big difference.
To service your carburetor, start by recognizing signs like poor performance, starting issues, and unusual smells. Gather essential tools like screwdrivers and wrenches, and prepare your workspace for a tidy job.
Safely remove the carburetor, inspect gaskets and seals, then reassemble it correctly while ensuring proper air-fuel mixture adjustments. Secure all connections tightly, and you’ll improve your engine’s efficiency.
If you want to tackle troubleshooting after service, there’s more to uncover.
Key Takeaways
- Look out for signs of carburetor problems, like rough idling, trouble starting, or poor fuel economy.
- Gather essential tools such as screwdrivers, wrenches, and cleaning supplies to make the maintenance easier.
- Set up a clean, organized workspace, and carefully remove the carburetor following your vehicle’s manual.
- Check and replace gaskets and seals regularly, and make sure all connections are tight to keep everything running smoothly.
- Adjust the air-fuel mixture and test the components to ensure your engine performs at its best.
Recognizing When Your Carburetor Needs Service
How can you tell if your carburetor needs service? Pay attention to specific symptoms that signal trouble.
One of the first signs might be a decline in performance, like rough idling or stalling when you accelerate. If your engine has trouble starting or runs inconsistently, it’s time to check it out.
You may also notice less fuel efficiency, which can mean your carburetor isn’t mixing air and fuel properly. Look out for strange smells like gasoline, which could indicate a leak.
Another sign is excessive exhaust smoke, suggesting your engine is burning too much fuel.
If you notice any of these issues, don’t ignore them. Fixing these problems early can save you from more costly repairs later. Regular checks and timely service help keep your engine running smoothly and efficiently.
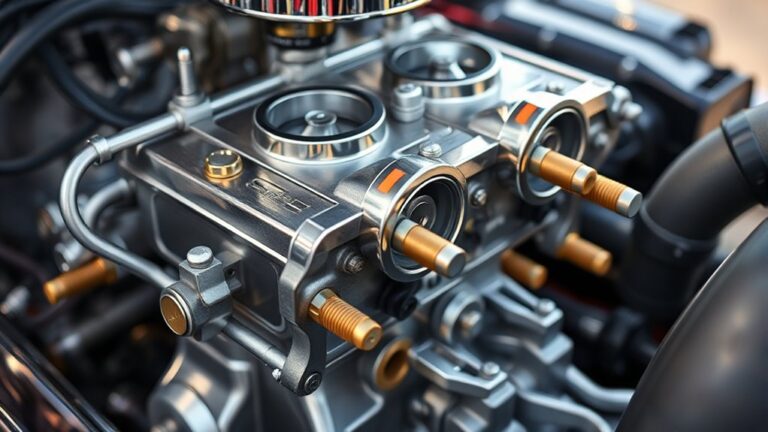
Understanding Carburetors and How They Work?
While many might think of carburetors as outdated technology, they still play a crucial role in mixing air and fuel for your engine. Understanding how they work helps you see their importance, especially since there are different types designed for various applications.
Key parts of carburetors include the air-fuel mixture, which ensures the right balance for efficient combustion. There are also different types, from single-barrel to multi-barrel, each serving specific needs.
Key components of carburetors, like the air-fuel mixture, are vital for achieving efficient combustion across various types.
Fuel regulations influence how carburetors are designed and how efficient they are. Proper adjustment and tuning can boost both performance and fuel economy.
Once you understand these basics, it’s easier to spot issues and do necessary maintenance. Whether you’re working on a classic car or a small engine, knowing how your carburetor functions is essential for keeping it running smoothly.
Essential Tools for Carburetor Maintenance
To keep your carburetor in good shape, you’ll want to have a few essential tools handy. Think of it like preparing your toolkit before starting any project—you’ll need some basic hand tools, cleaning supplies, and safety gear to get the job done right. Having everything ready means you can handle any maintenance task without a hitch.
Once you’ve got the right equipment, you’ll find that working on your carburetor becomes much easier and more efficient. So, gather your tools first, and you’ll be all set to keep your engine running smoothly!
Basic Hand Tools Needed
When servicing your carburetor, having the right tools can make all the difference. Proper tools not only make the job easier but also help you understand the carburetor design and ensure the correct fuel mixture.
Here are the essential hand tools you’ll need:
- Flathead and Phillips screwdrivers for loosening screws on the carburetor body.
- Socket and wrench set to remove bolts and nuts securely.
- Pliers for gripping and maneuvering small components.
- Feeler gauge to check the gap and guarantee proper adjustments.
With these tools by your side, you’ll be well-equipped to handle any carburetor maintenance task. This will help improve performance and efficiency. Remember, having the right tools leads to better results!
Cleaning Supplies Required
Having the right hand tools is just the start. You’ll also need effective cleaning supplies to keep your carburetor in top shape.
Different carburetor types may need specific cleaning methods, so it’s important to have the right solvents on hand. Start with a carburetor cleaner spray—this powerful solvent easily breaks down dirt and grime.
You’ll also want brushes in various sizes to reach those tricky spots. Don’t forget about compressed air for blowing out debris after cleaning.
A soft cloth will help you wipe down surfaces and ensure everything’s spotless. By stocking these essential supplies, you’ll be ready for a successful carburetor maintenance session.
Safety Gear Essentials
Before diving into carburetor maintenance, it’s crucial to equip yourself with the right safety gear. This helps protect you from potential hazards and makes your work smoother.
Here’s what you need:
- Safety goggles: Protect your eyes from debris and chemicals.
- Nitrile gloves: Keep your hands safe from harmful substances and give you a good grip.
- Respirator mask: Filter out harmful fumes and particles, especially when working with solvents.
- Work apron: Shield your clothes from spills and stains, and keep your tools handy.
Wearing these essentials not only boosts your safety but also makes the task more enjoyable. Remember, taking precautions now can save you from accidents later!
Get Your Workspace Ready for Carburetor Service
Preparing your workspace is key to a successful carburetor service. Make sure your area is clean and well-lit. Clear away clutter so everything is organized and easy to find.
Next, gather all the tools and supplies you’ll need, like screwdrivers, wrenches, and cleaning solutions. Using a toolbox or pegboard helps keep everything within reach and saves time searching.
Think about having a dedicated surface for your carburetor. A sturdy workbench helps you stay focused and work more precisely. Finally, have a plan for disposing of old parts or fluids safely.
With a well-prepared workspace, you’ll make the process smoother and more efficient.
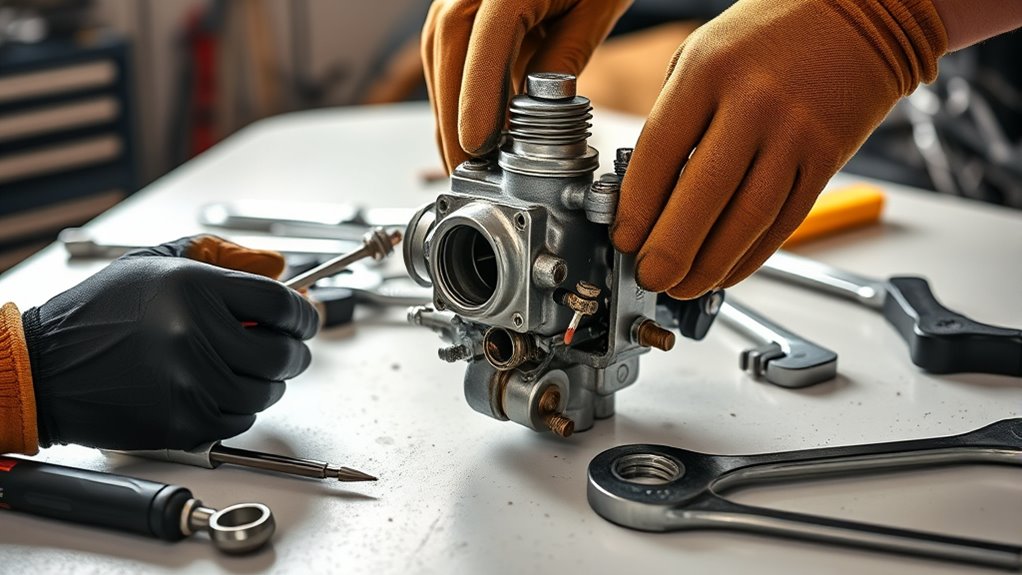
Safely Removing the Carburetor
- Disconnect the battery to prevent any electrical hazards while you work.
- Label hoses and wires so you remember where everything goes when you’re ready to reassemble.
- Use the right tools like wrenches and screwdrivers to avoid stripping screws and damaging parts.
- Work in a clean area because a tidy workspace helps prevent losing small parts or accidentally damaging components.
As you move through the process, take your time and stay gentle with delicate parts. Always check your vehicle’s manual for specific instructions for your carburetor model.
Cleaning Your Carburetor: Methods and Tips
Now that you’ve safely taken out your carburetor, it’s time to give it a good clean. Don’t worry, it’s not too complicated—you just need a few supplies and a simple step-by-step plan to do the job right. Let’s go over what you’ll need and how to approach the cleaning process smoothly.
Essential Cleaning Supplies Needed
To effectively clean your carburetor, gathering the right supplies is essential. Using the correct cleaning agents and tools can make a big difference in your maintenance routine. Here are some must-have items for your cleaning process:
- Carburetor cleaner: A strong cleaning agent to dissolve grime and deposits.
- Soft brushes: Perfect for reaching tight spots without scratching surfaces.
- Compressed air canister: Great for blowing out dirt and debris from small passages.
- Protective gloves: Keep your hands safe from chemicals and grime.
With these supplies, you’re ready to tackle your carburetor cleaning. Remember, proper maintenance tips can help extend the life of your carburetor and improve engine performance.
Step-by-Step Cleaning Process
Cleaning your carburetor can be pretty simple if you follow a few key steps. First, make sure you have the right cleaning supplies for your specific carburetor.
Start by removing the carburetor from the engine, paying attention to how it’s positioned so you can put it back correctly. Carefully disassemble it, taking out the float, jets, and gaskets.
Next, soak the parts in a carburetor cleaner to loosen any built-up grime. Use a soft brush to scrub stubborn spots, especially in the fuel pathways.
Rinse everything thoroughly with clean water and dry all parts completely before putting it back together.
Finally, reattach the carburetor, making sure all connections are tight and secure. Regular cleaning helps keep your engine running smoothly and efficiently!
Inspecting and Replacing Worn Gaskets and Seals
Here are some key considerations:
- Gasket Materials: Make sure to select the right gasket materials for your specific carburetor type to ensure a proper seal.
- Seal Types: Get familiar with different seal types like O-rings and flat seals so you can choose the best option.
- Inspection Technique: Use a flashlight to check hard-to-see areas for leaks or damage.
- Replacement Timing: Don’t wait for performance issues—it’s a good idea to replace gaskets and seals during routine maintenance.
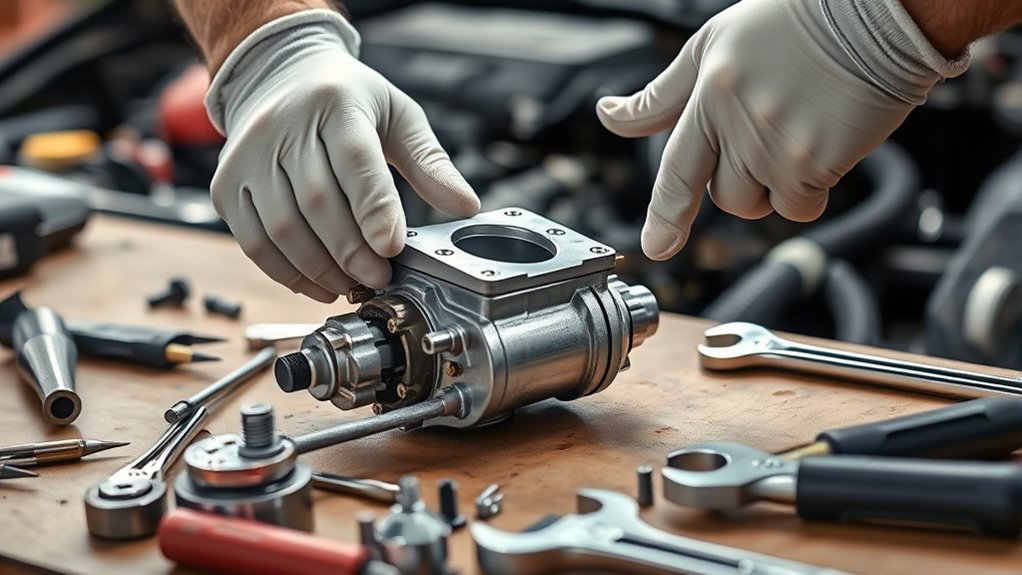
How to Reassemble the Carburetor Correctly
Putting your carburetor back together the right way is really important if you want it to run smoothly. Just take your time to line up all the parts properly and make sure those fasteners are tight enough. You don’t want any leaks or issues cropping up later on because of sloppy reassembly.
A little extra care now will save you a lot of trouble down the road. So, go slow, double-check everything, and you’ll be good to go!
Aligning All Components Properly
Once you’ve cleaned all the components, aligning them properly during reassembly is key to getting the best performance. If the parts aren’t aligned correctly, it can cause issues like poor fuel delivery and engine problems.
Use these carburetor alignment techniques to make sure everything fits perfectly. First, check that the gaskets are seated properly to prevent any leaks.
Next, make sure the throttle linkage is aligned for smooth operation and quick response. Then, adjust the float height so it allows maximum fuel flow for efficient running.
Finally, verify that the choke opens and closes freely without any obstructions. Proper alignment of these parts ensures your engine runs smoothly and efficiently.
Securing Fasteners Firmly
Secure the fasteners firmly to ensure your carburetor works smoothly. Start by identifying the different fastener types you’ll see, like screws, bolts, and nuts. Each one needs to be handled properly to get a tight fit.
When you reassemble, check your service manual for the right torque specs. This helps you avoid overtightening or leaving them too loose, which can cause leaks or damage. Use a torque wrench to apply the correct pressure.
Follow the specified sequence to keep even tension across all parts. Once everything is in place, double-check each fastener and make adjustments if needed. A well-secured carburetor improves performance and lasts longer, so take your time with this step.
How to Adjust the Air-Fuel Mixture for Better Performance
Adjusting the air-fuel mixture is key to getting the most out of your carburetor. It directly affects your engine’s performance, fuel economy, and how your throttle responds.
Start by using the right tuning tools to measure the mixture ratio. Then, check the idle speed to make sure everything runs smoothly.
Next, adjust the air intake to improve combustion. Keep an eye on emissions to stay within environmental standards.
Finally, fine-tune the mixture ratio to achieve peak performance. With these steps, your engine will run better and more efficiently.
Troubleshooting Common Carburetor Issues After Service
After servicing your carburetor, you might run into a few common issues that can affect how well it runs. If starting becomes difficult, check your fuel delivery—it could be blocked or not flowing properly.
Idle problems often come from an incorrect mixture, which can cause too much fuel to enter the engine. This might lead to stalling, so it’s important to adjust the air-fuel ratio correctly.
Air leaks can also mess with throttle response and cause the engine to behave unpredictably. If your engine struggles to keep steady speed or stalls unexpectedly, look for leaks around the carburetor and intake manifold.
To keep everything running smoothly, set up a maintenance routine. Regularly check the carburetor, fuel lines, and filters. Addressing these issues quickly will help your engine perform at its best and last longer.
Frequently Asked Questions
How Often Should I Service My Carburetor?
You should service your carburetor at least once a year, or more often if you notice any performance issues.
Regular maintenance helps prevent buildup and keeps everything running smoothly. Pay attention to how your engine runs; if you notice any changes, it’s time to check it out.
Following these carburetor maintenance tips can save you headaches down the road and keep your engine performing at its best.
Can I Use Household Cleaners for Carburetor Cleaning?
No, you shouldn’t use household cleaners for carburetor cleaning. These cleaners often contain harsh chemicals that can damage your carburetor’s components.
Instead, look for specialized carburetor cleaning solutions designed for this purpose. If you’re thinking about other options, a mixture of vinegar and water can be a milder alternative.
Just make sure to verify if it’s safe for your specific carburetor before trying it. Proper care will help keep your engine running smoothly and efficiently.
What Are the Signs of a Faulty Carburetor?
If your engine’s acting like a stubborn mule, it might be time to check for carburetor symptoms. You’ll notice performance issues like rough idling, stalling, or poor acceleration.
Maybe it’s sputtering like an old man trying to catch his breath. If your fuel efficiency drops or there’s black smoke from the exhaust, those are red flags.
Pay attention, and you might just save your ride from a costly repair.
Is It Safe to Use a Rebuild Kit?
Yes, it’s safe to use a rebuild kit for your carburetor. These kits can really help restore your engine’s performance and save you money compared to buying a whole new carburetor.
When installing the kit, just make sure to follow the instructions carefully. Check if there are any specific adjustments needed for your particular model.
Before you start, it’s a good idea to thoroughly clean the carburetor. This step ensures everything works smoothly and helps you get the best possible performance.
How Do I Store a Carburetor Long-Term?
Did you know that proper carburetor maintenance can extend its life by up to 30%? To store a carburetor long-term, start by cleaning it thoroughly and making sure it’s completely dry.
Use a fuel stabilizer to prevent varnish buildup, and seal the openings to keep moisture out. Store it in a cool, dry place, ideally in an airtight container.
Following these storage tips will help maintain its functionality for when you need it again.
Conclusion
Just like a well-tuned orchestra, your carburetor needs each part to work together for top performance. Servicing it with care and attention isn’t just fixing a machine; it’s creating a symphony of power and efficiency.
Take the time to nurture your carburetor, and it’ll reward you with smoother rides and better fuel economy. A little maintenance today can make a big difference tomorrow.
Remember, keeping your carburetor in good shape is key to a reliable and efficient engine. Proper servicing ensures it runs smoothly and helps you get the most out of your vehicle.