7 Simple Steps to Remove Your Carburetor
If you’re working on your vehicle and need to remove the carburetor, you’re not alone. Many people find this task a bit tricky at first, but with the right steps, it becomes much easier.
Whether you’re troubleshooting or doing some maintenance, knowing how to remove your carburetor is a useful skill.
To remove your carburetor, start by gathering all your tools. Next, disconnect the battery to guarantee safety.
Remove the air cleaner assembly to clear access. Then, safely disconnect the fuel lines and throttle linkages.
Once everything’s free, unbolt the carburetor from the intake manifold and carefully lift it out.
Finally, check for any problems and clean the area. If you want more detailed steps to make it even easier, keep going!
Key Takeaways
- Disconnect the battery, starting with the negative terminal, to prevent sparks during the removal process.
- Remove the air cleaner assembly by loosening clamps or screws so you can get clear access to the carburetor.
- Carefully disconnect fuel lines and throttle linkages, sealing fuel lines with a rag to minimize spills.
- Inspect the carburetor for leaks, corrosion, or other issues before removal. This helps you diagnose potential problems.
- Organize your tools and make sure all components are clean and ready for reinstallation. Remember to follow safety precautions throughout.
Gather Your Tools for Carburetor Removal

Before you start taking out the carburetor, make sure you have the right tools to make things easier. First, identify the type of carburetor you’re working with, since different models might need different tools.
Usually, you’ll need basic hand tools like screwdrivers, wrenches, and pliers. A socket set is also helpful for those stubborn bolts. Don’t forget a clean container to catch any fuel that might spill during removal.
Having a fuel adjustment tool on hand can make reinstallation smoother, especially if you need to fine-tune the fuel flow. A torque wrench is essential for tightening bolts to the manufacturer’s specs.
Finally, keep some rags and a funnel nearby to handle spills easily. With these tools ready, you’ll make the process more efficient and less messy.
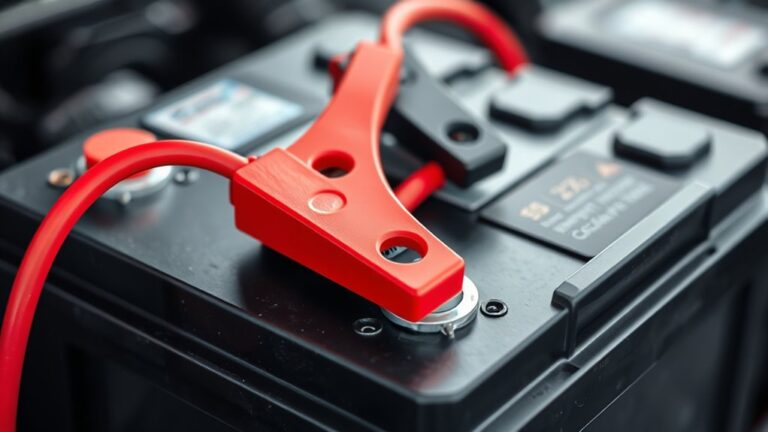
Start by Disconnecting the Battery for Safety
Before you begin removing the carburetor, it’s really important to disconnect the battery first. Just grab a wrench or socket that fits your battery terminals, and carefully disconnect them. This little step is key because it helps prevent any sparks or electrical mishaps while you’re working on the engine. Staying safe is always the top priority!
Importance of Safety First
When tackling carburetor removal, prioritizing safety is vital. Starting by disconnecting the battery is a smart move. This simple step helps prevent accidental sparks or electrical issues while you’re working.
Always wear your safety gear, including gloves and goggles. This shields you from potential hazards and keeps you safe during the process.
It’s important to stay aware of hazards throughout. Keep your workspace organized and free from clutter to avoid any mishaps.
Before diving in, take a moment to assess your surroundings for dangers like flammable materials or tools left lying around.
By following these safety measures, you’ll greatly reduce risks and make the carburetor removal smoother and more efficient.
Tools Needed for Disconnection
Having prioritized safety by disconnecting the battery, you’ll need a few specific tools to get started. Depending on the carburetor types you’re working with, the tools might vary slightly, but these essentials will help you remove it effectively.
You’ll want a socket set for loosening bolts and nuts, along with a screwdriver set that includes flathead and Phillips screwdrivers for various screws. Pliers are handy for gripping and pulling off hoses.
A fuel line disconnect tool is useful for safely detaching fuel lines without causing damage. And don’t forget a shop rag to catch any spills and keep your workspace clean.
With these tools ready, you’ll be well-equipped to tackle the carburetor removal process efficiently and safely.
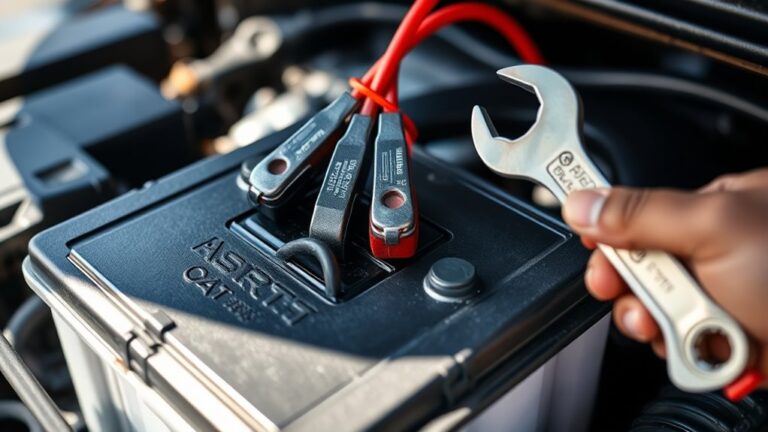
Proper Battery Terminal Handling
Disconnecting the battery is crucial for your safety when removing the carburetor. Start by taking off the negative terminal first to prevent accidental sparks.
Check for any corrosion on the battery. Corrosion can mess with the connections, so clean the terminals if you notice any buildup before moving on.
Here’s a quick step-by-step:
| Step | Action |
|---|---|
| 1. Inspect | Look for corrosion |
| 2. Prepare | Gather cleaning supplies |
| 3. Clean | Gently remove corrosion |
| 4. Disconnect Negative | Use a wrench to loosen it |
| 5. Disconnect Positive | Do the same for the positive terminal |
Always handle the terminals carefully to avoid damage. Once you’ve safely disconnected the battery, you’re good to continue with your carburetor removal.
Remove the Air Cleaner Assembly First
Before you get to the carburetor, you’ll want to remove the air cleaner assembly first. It’s a simple step, but it makes a big difference in getting everything accessible. Just gather the right tools and follow a straightforward removal process—it’s pretty smooth sailing.
Once the air cleaner assembly is out of the way, you’ll have a clear path to move on with the rest of the carburetor removal. Easy does it, and you’ll be set up for the next steps without any hassle.
Tools You Will Need
To successfully remove the carburetor, you’ll need a few essential tools to start by taking off the air cleaner assembly. Different carburetor types may require specific tools, but here’s a general list to get you going.
Following these maintenance tips will guarantee your process runs smoothly:
- Socket wrench set: For loosening bolts securely.
- Screwdriver set: A mix of flathead and Phillips for various screws.
- Pliers: Handy for gripping and pulling off clamps.
- Shop rag: Useful for cleaning surfaces and catching spills.
- Torque wrench: Guarantees proper tightening when reassembling.
With these tools, you’ll be well-equipped for the first step in your carburetor removal process.
Proper Removal Technique
As you start removing the carburetor, taking off the air cleaner assembly is key to getting access. Loosen the clamps or screws holding it in place—this step is crucial for good carburetor maintenance.
Carefully lift the assembly off, making sure you don’t damage nearby parts. Once it’s out of the way, you’ll see the carburetor clearly, making it easier to disconnect fuel lines and linkages.
Pay attention to details—this makes your job easier and helps keep your engine running smoothly. Keeping your workspace clean and working methodically will also make reinstallation much simpler when you’re ready to put everything back together.
Safely Disconnect Fuel Lines and Throttle Linkages
Start by carefully disconnecting the fuel lines and throttle linkages to ensure a smooth carburetor removal. This step is crucial to prevent spills or damage.
Here’s how to do it safely:
Wear protective gear like safety goggles and gloves to shield yourself from fuel splashes.
Locate the fuel line where it connects to the carburetor. Use a wrench to loosen the fitting without stripping it.
Next, disconnect the throttle linkage by unclipping or unscrewing it from the carburetor.
Finally, seal the fuel line with a rag to minimize any potential spills.
Unbolt the Carburetor From the Intake Manifold
With the fuel lines and throttle linkages safely disconnected, you can now focus on unbolting the carburetor from the intake manifold. Start by identifying the bolts securing it, depending on whether you have a two-barrel or four-barrel model.
Use a socket wrench to carefully loosen and remove these bolts. Keep track of each one because they can be different lengths and sizes. It’s important to work methodically to avoid dropping any hardware into the engine bay.
Once all the bolts are out, gently wiggle the carburetor to break the seal created by the gasket. Be careful not to damage the intake manifold in the process. After it’s free, you’re one step closer to removing your carburetor.
Take your time and double-check that everything is clear before moving on to the next step.
Carefully Remove the Carburetor From the Vehicle
Gently lift the carburetor from the intake manifold, making sure to support its weight so you don’t strain the linkage or fuel lines. Keep in mind that different carburetor types can affect engine performance.
Check for any remaining connections, like fuel lines and electrical wires, to ensure everything is clear before removal. Move smoothly and avoid sudden jerks to prevent damaging any parts.
Look for dirt or grime around the carburetor that could impact future performance. Keep your workspace organized by laying out all parts and bolts for easy reassembly.
Take notes or snap photos of the setup. This will help you remember how everything goes back together when reinstalling.
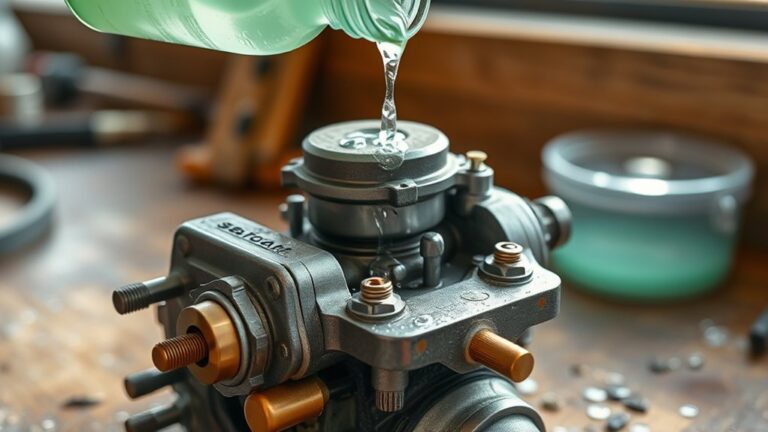
Check for Problems and Clean Up the Area
Before diving into the cleaning process, it’s important to check for any problems that might have gone unnoticed. Look for signs of leaks, corrosion, or any irregularities in the connections. These issues can affect your carburetor’s performance, so thorough problem diagnosis is vital.
Once you’ve assessed the situation, focus on area cleanliness. Clear away any debris or dirt from the workspace to prevent contamination. Use a rag or shop towel to wipe down surfaces and confirm everything is organized.
This not only provides a safer environment but also makes it easier to spot any additional issues with your carburetor or surrounding components. Finally, dispose of any old fuel or cleaning materials properly.
Keeping your workspace clean and organized will contribute to a smoother reinstallation process. With everything checked and cleaned, you’re ready for the next steps in your carburetor removal.
Frequently Asked Questions
How Do I Identify the Correct Carburetor for My Vehicle?
To identify the correct carburetor for your vehicle, start by checking your owner’s manual for recommended types. Look for details like engine size and model year since these affect compatibility.
Online databases and forums can also be helpful in matching your vehicle’s needs. Keep in mind any modifications you’ve made, as they might require a different carburetor to ensure optimal performance.
What Are Common Symptoms of a Faulty Carburetor?
When your engine stutters like a hesitant dancer, it’s a sign your carburetor might be struggling. You’ll notice performance issues like rough idling, poor acceleration, or backfiring.
If the air-fuel mixture’s off, carburetor adjustments can feel like a desperate plea for harmony. A faulty carburetor disrupts the rhythm of your ride, leaving you yearning for smooth, effortless journeys.
Pay attention, and you’ll hear what your vehicle’s trying to tell you.
Can I Clean a Carburetor Without Removing It?
Yes, you can clean a carburetor without removing it, but it’s not as thorough. Just use a carburetor cleaner spray to reach the jets and throttle body.
Make sure to follow proper maintenance tips, like running the engine to circulate the cleaner. This helps remove some gunk and improve performance.
Keep in mind, a complete disassembly allows for a deeper clean and better results in the long run.
What Should I Do if Fuel Leaks Occur During Removal?
If fuel leaks happen during removal, turn off the fuel line right away to stop more fuel from spilling.
Make sure to wear gloves and goggles to keep yourself safe. Have a container ready to catch any fuel that leaks out and ensure good ventilation in your workspace.
Once you’ve contained the leak, check where it’s coming from. Tighten any loose connections or replace faulty parts as needed.
Always put safety first before continuing with the removal process.
How Often Should I Service My Carburetor?
You should service your carburetor at least once a year or every 10,000 to 15,000 miles, whichever comes first. Regularly checking for dirt, wear, and fuel leaks can help keep it running smoothly.
Carburetor maintenance tips include cleaning the jets and adjusting the float level if needed. If you notice any issues, don’t wait—address them quickly to prevent bigger problems later on.
Sticking to these service guidelines will help your engine perform at its best and avoid costly repairs down the line.
Conclusion
Removing your carburetor might seem intimidating, but with these seven simple steps, you’ll be a pro in no time. Did you know that nearly 30% of classic car enthusiasts handle their own carburetor repairs?
By taking on this task yourself, you not only save money but also gain valuable hands-on experience with your vehicle. So, roll up your sleeves, follow the steps, and enjoy the satisfaction of mastering this essential skill!