How to Use Everstart Maxx Battery Charger: A Step-by-Step Guide
Many car owners know the frustration of a dead battery, especially when you’re in a hurry or caught off guard. If you’ve struggled with charging your battery safely and effectively, you’re not alone.
The Everstart Maxx Battery Charger is designed to make this process easier, even for beginners.
To use the Everstart Maxx Battery Charger, start by ensuring it’s compatible with your battery type. Place it on a stable surface and connect the red clamp to the positive terminal and the black clamp to the negative. Plug it into a power source.
Watch for indicator lights: a green light means a full charge, while red indicates charging. Always monitor for overheating and check connections.
You’ll find more tips for battery maintenance and troubleshooting ahead.
Key Takeaways
- Before using, double-check that the charger is compatible with your battery type, whether it’s lead-acid, AGM, or lithium-ion.
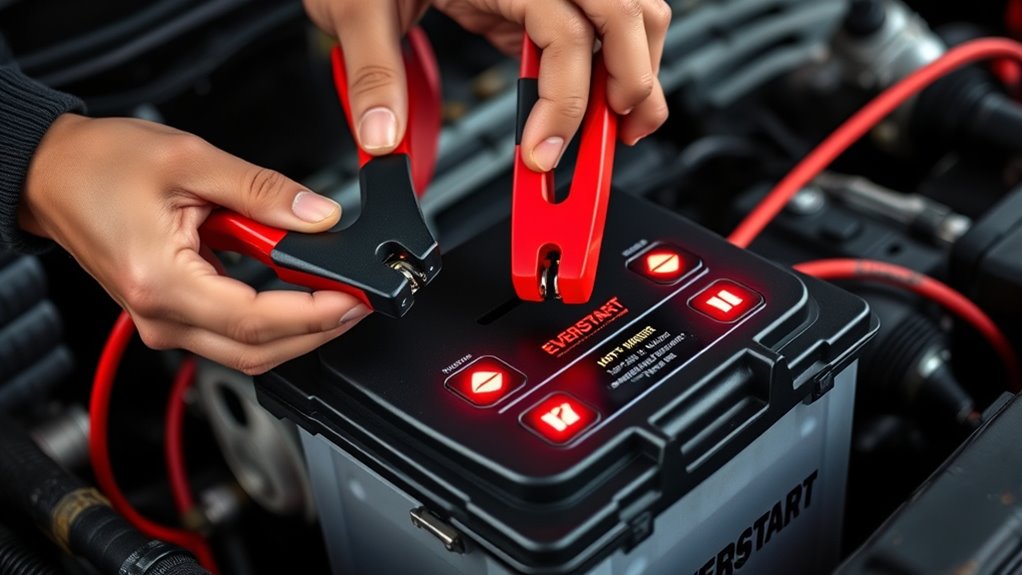
- Connect the red clamp to the positive terminal and the black clamp to the negative terminal securely.
- Keep an eye on the indicator lights: green means the battery is fully charged, red shows it’s charging, and yellow indicates maintenance or faults.
- Make sure to use the charger in a well-ventilated, stable area away from anything flammable for safety.
- Regularly inspect the connections and the battery itself to prevent overheating and keep everything working smoothly.
What Is the Everstart Maxx Battery Charger?
The Everstart Maxx Battery Charger is a versatile tool designed to recharge various types of batteries efficiently. Whether you’re dealing with lead-acid, AGM, or lithium-ion batteries, this charger has you covered. You’ll appreciate its user-friendly interface, which allows you to select appropriate charging methods based on the battery type.
When you plug in the charger, it automatically detects the battery’s condition, guaranteeing peak charging. This feature not only saves time but also helps improve battery life. You can use it for automotive, marine, or even small power tools, making it a handy addition to your toolkit.
With the Everstart Maxx, you won’t have to worry about overcharging. It comes with built-in safety features that make the process hassle-free. This helps you maintain your batteries effectively and reliably. So whether you’re at home or on the go, this charger is ready to perform.
Top Features of the Everstart Maxx That Enhance Charging
When you choose the Everstart Maxx Battery Charger, you’ll quickly notice its standout features that make charging a breeze. One of the key aspects is its impressive charging efficiency, which guarantees your battery is charged quickly and effectively. This means less waiting and more driving time for you.
The user experience is improved by its intuitive design and easy-to-read display. You’ll appreciate the clear indicators that show the charging status, so you know exactly where your battery stands. The automatic shut-off feature adds to the convenience, preventing overcharging while you focus on other tasks.
With multiple modes for different battery types, the Everstart Maxx adapts to your needs, making it versatile for various applications. These features combine to deliver a hassle-free charging experience, letting you get back on the road without any fuss.
Safety Precautions Before Charging
Before you begin charging, it’s a good idea to put on some protective gear. This helps keep you safe from any potential hazards that might come up. Also, take a quick look at your charger and cables—check for any damage or wear and tear. Damaged cords can be pretty risky, so it’s better to be cautious.
Lastly, pick a safe spot to charge your device. Make sure the area is free of any flammable materials, like paper or cloth, to keep everything secure and prevent any accidents.
Wear Protective Gear
Although charging a battery might seem simple, wearing protective gear is crucial for your safety. It helps reduce the risk of injury from acid spills or electrical shocks.
Always wear safety goggles to keep your eyes safe from splashes, and don’t forget your protective gloves to shield your hands. These precautions are easy but vital.
Here’s a quick guide to the essential gear:
| Gear | Purpose |
|---|---|
| Safety Goggles | Protects eyes from splashes |
| Protective Gloves | Shields hands from chemicals |
| Long-Sleeved Shirt | Reduces skin exposure |
| Closed-Toe Shoes | Protects feet from falling objects |
Inspect Charger And Cables
Start by giving your charger and cables a thorough inspection to confirm they’re in good condition. Check for any visible damage, like frayed wires or cracks in the charger casing.
Different charger types may have specific requirements, so make sure you’re using the correct one for your battery. Pay close attention to the connections; they should fit snugly and show no signs of corrosion.
Regular cable maintenance is essential—clean the connectors with a dry cloth to remove dirt or oxidation. If you notice any issues, don’t try to use the charger. It’s better to be safe than sorry.
A well-maintained charger and cables can greatly improve safety and efficiency during the charging process.
Choose Safe Location
Choosing a safe location for your Everstart Maxx battery charger is key to keeping things safe and working well. Make sure the charger sits on a flat, stable surface away from anything flammable.
Avoid places with high humidity or extreme temperatures, as these can affect how well the charger works and safety. Charging in a well-ventilated area is best to let gases escape safely.
Keep the charger out of reach of children and pets to prevent accidents. By thinking about the environment, you’ll set up a safe and effective charging space.
Taking these steps helps minimize risks and makes sure your charging experience is smooth and efficient.
Setting Up Your Everstart Maxx Charger
Before you start charging your battery, make sure your Everstart Maxx Charger is set up correctly. Check if it’s compatible with your battery type—lead-acid, AGM, or gel—and adjust the settings accordingly. This helps ensure the process is both safe and efficient.
Next, place the charger on a stable surface away from any flammable materials. Connect the red clamp to the positive terminal and the black clamp to the negative terminal of your battery. Make sure the clamps are secure so they don’t come loose during charging.
Finally, plug the charger into a reliable power source and double-check everything is in place. These simple steps will help make your charging experience smooth and successful.
Charging Your Everstart Maxx: A Step-By-Step Process
Charging your Everstart Maxx is easy and only takes a few steps. First, figure out what type of battery you’re working with—lead-acid, AGM, or gel. This helps you choose the right settings on your charger.
Next, connect the red clamp from the charger to the battery’s positive terminal, and the black clamp to the negative terminal. Once connected, plug in the charger and pick the correct charging cycle for your battery.
If you’re unsure which cycle to choose, check the charger’s manual for guidance. Then, start the charging process and keep track of the time. Most batteries need several hours to fully charge.
When charging is done, unplug the charger and disconnect the clamps in the reverse order. This keeps things safe and prevents any accidental shorts. Your Everstart Maxx is now ready to go!
Understanding Charger Indicators: What Those Lights Mean?
When you’re using your Everstart Maxx battery charger, it’s really helpful to know what those light indicators are telling you. They give you a quick peek at what’s happening with your battery and the charging process, so you can stay in the know and handle things smoothly.
Those little lights are like your charger’s way of talking to you—showing you whether everything’s going well or if there’s something that needs attention. Understanding what each indicator means can save you time and frustration, especially when troubleshooting common issues.
Light Indicators Explained
Understanding the light indicators on your Everstart Maxx battery charger is key to using it effectively. These lights give you important info about what’s happening during charging.
For example, a green light usually means your battery is fully charged. A red light shows that charging is still in progress. If you see a yellow light, it might mean your battery needs maintenance or could be faulty.
Knowing what these colors mean helps you quickly check the charger’s status. Always refer to the user manual for specific details, since different models might have different indicators.
Paying attention to these lights ensures your charger works well and can help extend the life of your battery.
Troubleshooting Common Issues
If you run into issues with your Everstart Maxx battery charger, it’s important to understand what the indicator lights mean.
A solid green light usually means your battery is fully charged and working well. If you see a blinking red light, it could suggest compatibility issues or a problem with the battery itself.
This might impact battery performance, so double-check your connections and make sure you’re using the correct charger for your battery type.
If the lights aren’t acting as they should, unplug the charger, wait a moment, and then plug it back in.
Always refer to the manual for specific meanings of the lights.
Battery Maintenance During Charging
While you’re charging your battery, it’s important to keep an eye on its condition to ensure it performs well and lasts longer. Regular maintenance during charging can really help extend your battery’s lifespan.
Here are some tips to keep in mind:
| Tip | Importance |
|---|---|
| Monitor temperature | Helps prevent overheating |
| Check connections | Ensures efficient charging |
| Observe charging frequency | Prolongs battery life |
Troubleshooting Common Charging Issues
When you’re using your Everstart Maxx battery charger, you might come across a few hiccups along the way. For example, if you notice that the power indicator light isn’t turning on, or if the battery just isn’t charging like it should, don’t worry — these are pretty common problems. Sometimes, the charger might also overheat during use, which can be concerning.
The good news is, most of these issues are easy to fix once you know what to look for. So, let’s walk through some simple steps to troubleshoot and get your charger back in working order.
No Power Indicator Light
A common issue you might face with the Everstart Maxx Battery Charger is the absence of a power indicator light. This can be frustrating, but don’t worry; troubleshooting is straightforward.
Here are some steps to take into account:
Check if the power source is working and properly connected. Sometimes, the outlet might be the problem.
Inspect the cables for any damage or loose connections. Damaged or loose cables can prevent the charger from turning on.
Verify that your battery is compatible with the charger. Using an incompatible battery could be the reason it’s not powering up.
Follow charger maintenance tips like regularly cleaning the terminals and storing it in a cool, dry place. Proper care can help prevent issues.
Battery Not Charging Properly
If your Everstart Maxx Battery Charger isn’t charging properly, you’re not alone—many users face this problem. First, make sure the connections are secure and free from corrosion. Loose or dirty terminals can really affect how well it charges.
Check the condition of the battery too. A damaged battery can block the charging process and even shorten its lifespan. If the charger’s indicator lights aren’t working, that might mean the charger itself has an issue.
Try resetting the charger or testing it on a different battery to see if that helps. If the charger gets hot or acts strangely, stop using it right away. Fixing these common problems can help keep your charger running smoothly and your batteries in good shape.
Overheating During Charging Process
Overheating during the charging process can be pretty frustrating, especially after fixing issues like improper charging. Several factors can cause this, so it’s important to know what to look for.
Poor ventilation around the charger is a common culprit. Make sure there’s enough airflow to keep things cool. Also, double-check that you’re using the right settings for your battery type.
Overcharging the battery can lead to overheating too. Try not to leave it plugged in longer than necessary. If overheating still happens, consider testing with a different charger or battery.
Taking these steps can help prevent damage and extend your battery’s life. Always keep safety in mind while charging!
When Charging Isn’t Enough: Signs Your Battery Needs Replacement
While charging your battery can often restore its performance, there are times when it’s clear that replacement is necessary. Understanding battery lifespan and recognizing signs that it’s time for a new one are key for your vehicle’s reliability.
Here are some important signs to watch out for:
| Replacement Signs | Symptoms | Emotional Response |
|---|---|---|
| Swelling | Physical deformity | Concern and frustration |
| Diminished capacity | Frequent recharges | Inconvenience and anxiety |
| Corrosion | Visible damage | Worry and urgency |
| Age | Over 3-5 years old | Realization of urgency |
If you notice any of these signs, it’s time to think about replacing your battery. Waiting too long could leave you stranded, so it’s best to stay proactive and keep your vehicle running smoothly.
Tips for Long-Term Battery Care
To make sure your battery lasts as long as possible, it’s important to follow a few simple care tips. Doing so not only extends its lifespan but also helps you avoid unexpected breakdowns.
Keep your connections clean. Corrosion can reduce efficiency, so regularly check and clean the terminals.
Regularly inspect and clean your battery terminals to prevent corrosion and maintain optimal efficiency.
Try not to let your battery drain completely, as deep discharges can shorten its life.
If you’re not using the battery for a while, store it in a cool, dry place and keep it charged.
For maintenance-free batteries, regularly check that the electrolyte levels are adequate.
Frequently Asked Questions
Can I Use the Charger for Different Battery Types?
Yes, you can use the Everstart Maxx battery charger for different battery types, but make sure to check compatibility first. The charger has settings for various lead-acid batteries, including standard, AGM, and gel types.
Just remember to adjust the settings accordingly. Always refer to the user manual for specific instructions on different battery types to ensure safe and efficient charging.
This way, you’ll get the best performance from your charger and keep your batteries in great shape.
How Long Does It Take to Fully Charge a Battery?
It usually takes a few hours to fully charge a battery, but the exact time depends on the battery capacity and your Everstart Maxx charger’s speed.
Smaller batteries might charge in around 4 to 6 hours, while larger ones could take 12 hours or more.
Always check the charger’s indicators to monitor progress. This way, you’ll know when your battery is fully charged and ready to go.
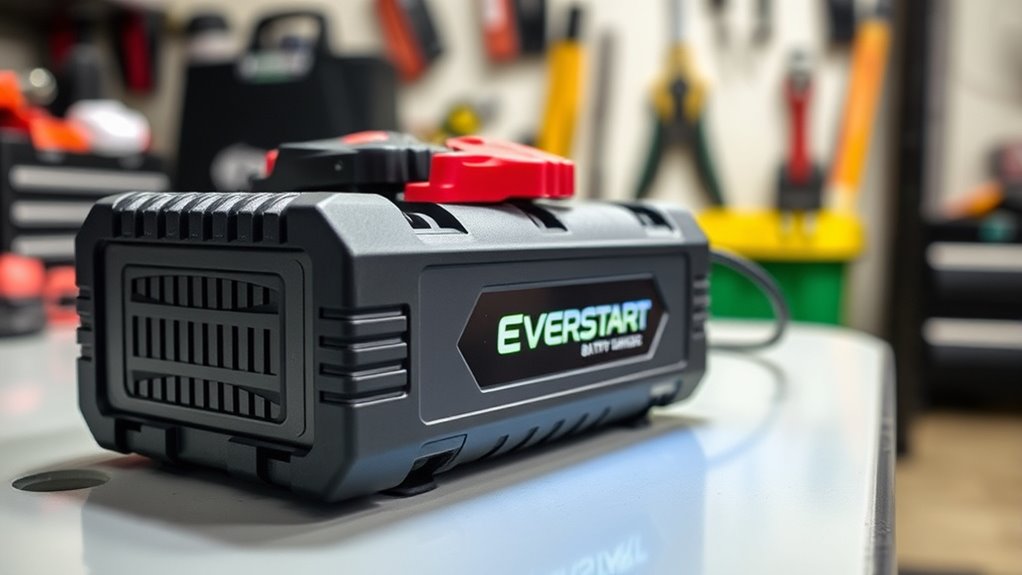
Is the Charger Portable for On-The-Go Use?
Yes, the Everstart Maxx Battery Charger has a portable design that’s perfect for on-the-go use. Its lightweight and compact structure make it easy to take with you wherever you go.
Whether you’re on a road trip or just running errands, you won’t have to worry about a dead battery. Just pack it up, and you’re ready to charge anytime and anywhere!
What Should I Do if the Charger Shows an Error?
If your charger shows an error, start by checking the error codes displayed. Look up what they mean in the manual to understand the specific issue.
Often, the problem could be a loose connection or an incompatible battery. Make sure everything is securely plugged in and try resetting the charger.
If the error keeps showing up, refer to the troubleshooting tips in the manual or contact customer support for help.
Don’t ignore these warnings—they can help you avoid damaging your battery or charger.
Can I Leave the Charger Connected Overnight?
Yes, you can leave the charger connected overnight, but make sure to prioritize battery maintenance and charger safety. Most modern chargers have features to prevent overcharging, but it’s a good idea to check the user manual for specific guidelines.
Regularly monitoring the connection can help you avoid potential issues. If you’re using an older model, consider disconnecting it once fully charged to keep your battery healthy and ensure safety.
Conclusion
To summarize, using the Everstart Maxx battery charger is simple and effective, helping your batteries stay in great condition. Regular maintenance with the charger can actually extend your battery life by up to 50%.
By following the steps in this guide, you’ll not only make charging easier but also help your batteries last longer. Taking a few moments to care for your batteries can save you money and hassle down the road.
So, prioritize using the Everstart Maxx battery charger regularly. It’s a smart move that pays off in the long run, keeping your batteries in top shape for years to come.