7 Simple Steps to Install a Carburetor
Are you tired of sluggish performance or inconsistent engine behavior? Upgrading or replacing your carburetor can really boost your vehicle’s efficiency, but the thought of doing it yourself might seem overwhelming. Don’t worry — many people struggle with this process, but with a little guidance, you’ll be able to tackle it confidently.
Upgrading or replacing your carburetor can enhance your vehicle’s performance considerably. First, gather your tools and materials.
Then, safely remove the old carburetor, labeling hoses for easy reassembly. Prepare your new carburetor and workspace to guarantee efficiency.
Install the new unit, secure it with bolts, and connect fuel and air lines. Finally, tune it for peak performance.
Stick around to find tips for troubleshooting common issues and enhancing your installation process even further.
Key Takeaways
- Disconnect the battery and gather necessary tools, including wrenches, sockets, and a gasket set for installation.
- Safely remove the old carburetor by labeling hoses, using a catch pan, and wearing safety gear.
- Prepare your workspace with good lighting and ventilation, and keep your tools organized to work efficiently.
- Position the new carburetor over the intake manifold, making sure it’s aligned properly before securing it.
- Tune the carburetor by adjusting the idle mixture screw and setting the float level for the best performance.
Why Upgrade or Replace Your Carburetor?
Upgrading or replacing your carburetor can significantly boost your vehicle’s performance, especially if you want more horsepower or better fuel economy. A new carburetor helps deliver the right air-fuel mixture, making acceleration smoother and your throttle more responsive.
You’ll really notice the difference during high-demand moments, like merging onto highways or climbing hills. Modern carburetors also come with advanced features that improve overall efficiency, leading to better gas mileage.
To get the most out of these benefits, it’s important to pick the right carburetor for your engine type and driving style. When installing, follow the manufacturer’s guidelines carefully.
Make sure everything is aligned correctly and fittings are secure. This helps prevent leaks and ensures your carburetor works at its best. Taking your time with the installation will pay off with a vehicle that performs better than ever.
Gather Your Tools and Materials for Carburetor Installation
Once you’ve decided to upgrade your carburetor, gathering the right tools and materials is your next step. Having everything ready will make the installation smooth and efficient.
Here are three vital items you’ll need:
- Wrenches and Sockets: Make sure you have the right sizes for your specific carburetor types; this will save you time and frustration.
- Gasket Set: A new gasket is important for preventing leaks, so don’t skip this step.
- Fuel Line: Depending on your setup, you might need a new fuel line to guarantee proper flow.
With these tools, you’re set for a successful installation. Remember to double-check compatibility with your vehicle and follow the manufacturer’s guidelines closely.
Doing this prep work will make the process much easier and help you get the best performance from your new carburetor.
Remove the Old Carburetor Safely
Before diving into installing your new carburetor, it’s crucial to safely remove the old one. Start by disconnecting the battery to prevent any electrical issues.
Next, gather the right tools for the job. Carefully detach any hoses and linkages connected to the old carburetor, and be sure to label them for reassembly later.
Gather the necessary tools and carefully label all hoses and linkages for a smooth reassembly process.
Wear safety goggles and gloves to protect yourself from fuel spills and debris. Place a catch pan under the carburetor to collect any leftover fuel.
Once everything is disconnected, unbolt the carburetor from the intake manifold. Take your time here; rushing can cause damage. After it’s free, check the mounting surface for debris before moving on.
Following these safety steps will make the removal process easier and set you up for a smooth installation of your new carburetor.
Get Your New Carburetor Ready to Go
Getting your new carburetor ready to go? Before you dive in and install it, take a moment to gather all the tools you’ll need. Trust me, having everything within reach makes the job way easier and faster. Plus, a clean, organized workspace is a game-changer—it helps you stay focused and prevents any accidental messes or mistakes.
Gather Necessary Tools
To tackle your carburetor installation smoothly, you’ll want to have a few essential tools ready. Different carburetor types might need specific tools, so it’s smart to gather the basics before you start.
Here are three must-have items:
- Socket set – A good socket set will help you easily remove and tighten bolts.
- Screwdriver set – Flathead and Phillips screwdrivers are essential for securing various components.
- Torque wrench – This ensures you apply the right amount of force and avoid damaging the carburetor.
Having these tools ready will make the process much easier. Getting organized now will save you time and frustration later.
Prepare the Workspace
Preparing your workspace is key to a smooth carburetor installation. Make sure your area is well-lit and free from clutter. Keeping things organized helps you find tools and parts quickly, saving you time and hassle. Lay out your tools and the new carburetor neatly so everything’s within easy reach.
Next, take some safety precautions. Wear gloves to protect your hands from fuel and sharp edges. Safety goggles are a good idea to shield your eyes from debris. If you’re in a garage, check that the ventilation is good to avoid inhaling fumes. By staying organized and safe, you’ll create a workspace that makes the whole process easier.
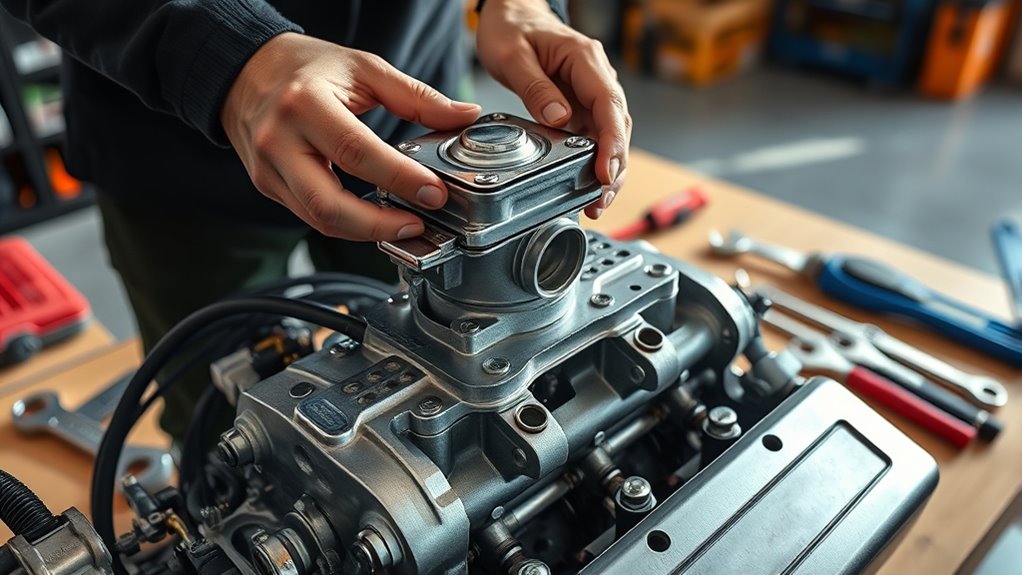
Install the New Carburetor Correctly
Once you’ve verified that all necessary tools and parts are at hand, it’s time to install the new carburetor correctly. Start by positioning the carburetor over the intake manifold, making sure it’s properly aligned. This step is crucial for optimal performance.
Next, follow these three steps:
Next, ensure a smooth installation by securing the bolts, connecting the throttle linkage, and checking for any gaps.
- Secure the Mounting Bolts: Hand-tighten the bolts to hold the carburetor in place, then use a torque wrench to tighten them to the manufacturer’s specifications.
- Connect the Throttle Linkage: Attach the throttle linkage, ensuring it moves smoothly without binding. Adjust it if needed for proper engagement.
- Check for Gaps: Inspect for any gaps between the carburetor and the manifold, as even small spaces can cause air leaks.
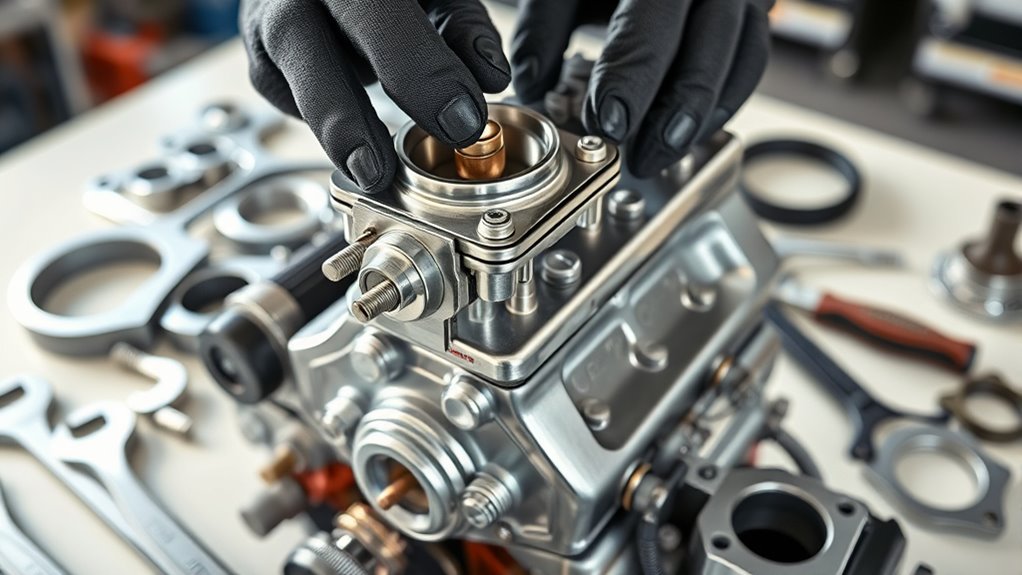
Securely Connect Fuel and Air Lines to the Carburetor
Before you fire up your engine, making sure the fuel and air lines are securely connected to the carburetor is essential. First, check that you have the correct fuel line connections.
Look for any cracks or damage in the lines, since a faulty line can cause leaks. Slide the fuel line onto the carburetor fitting, then tighten the clamp with a screwdriver to ensure a snug fit.
Next, focus on the air line adjustments. Attach the air intake line, making sure it sits flush against the carburetor. If your setup includes an air filter, double-check that it’s properly positioned to keep debris out.
Take a moment to double-check both connections. A secure fit is key to optimal engine performance. Once everything feels tight and in place, you’re ready to move on to the next steps in your carburetor installation.
Tune the Carburetor for Best Performance and Common Issues
Tuning your carburetor is key to getting the best engine performance and fixing common issues. Proper tuning can boost fuel efficiency, improve throttle response, and cut emissions.
Start by adjusting the idle mixture screw until you find a smooth idle. This helps your engine run efficiently at low RPMs. Then, check and set the float level to avoid flooding or starvation, ensuring consistent fuel delivery.
Next, inspect all connections for leaks. Even small leaks can mess with performance and cause problems later on. Regular checks and adjustments keep your engine running smoothly and help prevent issues before they start.
Frequently Asked Questions
How Do I Know if My Carburetor Needs Replacing?
You’ll know your carburetor needs replacing if you notice signs of wear like poor engine performance, rough idling, or excessive fuel consumption.
Regular carburetor maintenance tips include checking for leaks and making sure it’s clean. If you see black soot around the carburetor or it’s failing to start, those are red flags too.
Trust your instincts—if it’s causing persistent issues, it’s probably time to consider a replacement to keep your engine running smoothly.
Can I Install a Carburetor Without Prior Experience?
Yes, you can install a carburetor without prior experience! Just start by learning the basics—understand its parts and how it works.
Gather your tools and look for installation tips from trustworthy sources. Take your time, and don’t forget to label your connections.
If you get stuck, ask for help. With patience and attention to detail, you’ll build confidence and get the job done.
What Are the Signs of a Bad Carburetor?
You’ll notice several carburetor symptoms if yours is malfunctioning. Look out for performance issues like rough idling, stalling, or poor acceleration.
If your engine sputters or hesitates during acceleration, that’s a red flag. Excessive fuel consumption or black smoke from the exhaust can also point to problems.
If you’re experiencing these signs, it’s essential to inspect the carburetor to avoid further damage to your engine. Don’t wait—address these issues promptly!
How Long Does a Carburetor Installation Typically Take?
Installing a carburetor can feel like a race against the clock. Typically, it takes about 2 to 4 hours.
But keep in mind, it really depends on how complex the carburetor is.
If you’re working with a simple model, you might get it done faster.
However, if it has more intricate features, be prepared to spend some extra time fine-tuning everything.
Just take your time, and you’ll have it running smoothly!
Are There Specific Carburetor Models for My Vehicle Type?
Yes, there are specific carburetor models for your vehicle type. To make sure you get the right one, check your vehicle’s specifications, like engine size and type.
Manufacturers usually give recommendations based on these details. If you’re unsure, your owner’s manual or a trusted mechanic can help you find the right match.
Don’t skip this step. Using the wrong carburetor can cause problems later on and affect your vehicle’s performance and efficiency.
Conclusion
Upgrading or replacing your carburetor can boost your engine’s efficiency by up to 10%, giving you more power and better fuel economy.
By following these seven simple steps, you’ve not only improved your vehicle but also gained valuable hands-on experience.
Remember, a well-tuned carburetor can make all the difference in performance.
So, roll up your sleeves and enjoy the satisfaction of a job well done. Your ride will thank you for installing a new carburetor!