How to Use a Schumacher Battery Charger Step-by-Step
Many drivers have experienced the frustration of a dead battery when they least expect it. Whether you’re rushing to work or heading out for a trip, that sudden car trouble can be stressful and inconvenient.
You’re not alone—dealing with battery issues is a common challenge, but luckily, a Schumacher battery charger can be your reliable solution.
To use a Schumacher battery charger, start by identifying your battery type and ensuring your charger matches it. Connect the red clamp to the positive terminal and the black clamp to the negative terminal.
Select the appropriate charge mode, and monitor the charging process for any issues. Once charged, turn off the charger and disconnect the clamps in the correct order.
Keep this charger in a safe place for future use, and you’ll uncover even more useful tips ahead.
Key Takeaways
- First, identify the type of battery you’re working with and make sure the Schumacher charger settings match up for safe charging.
- Next, connect the charger clamps securely—red to the positive terminal and black to the negative terminal.
- Choose the right charging mode based on what your battery needs—whether it’s standard, fast, or maintenance mode.
- Keep an eye on the charging process for any unusual signs and check the voltage levels regularly to stay safe.
- When you’re done, disconnect the charger in the right order: unplug it first, then remove the negative clamp followed by the positive.
How Schumacher Battery Chargers Work

Schumacher battery chargers work by turning AC power from your outlet into DC power, which your battery needs to recharge. This process is key for different battery types like lead-acid and AGM, making sure they get the right voltage and current.
They use advanced technology to optimize the charging cycle, helping prevent overcharging or overheating. When you connect your battery, the microprocessor inside keeps an eye on the process and adjusts the power output based on the battery’s condition.
This smart tech makes charging more efficient and helps extend your battery’s lifespan. Depending on the model, you might also have features like multi-stage charging, which boosts overall battery performance. By understanding how these chargers work, you can get the most out of them and keep your batteries ready to go.
Preparing Your Battery and Charger
Before you start charging, it’s important to make sure both your battery and charger are ready. First, identify your battery type—lead-acid, AGM, or lithium—as this affects the charger settings.
Make sure your charger matches your battery type to ensure safe and efficient charging. Check the settings: for lead-acid, use 12V/6A; AGM needs 12V/4A; lithium requires 12V/2A with lithium-specific mode; marine batteries are 12V/5A; and motorcycle batteries are 12V/1A.
Ensure your charger matches the battery type for safe, efficient charging: 12V/6A for lead-acid, 12V/4A for AGM, and more.
Next, inspect your battery for any damage or corrosion. Clean the terminals if needed. Once everything is set, you’re ready to connect your charger safely.
Doing this prep work helps guarantee a smooth and safe charging experience.
Connecting the Charger to Your Battery
Before you hook up the charger to your battery, it’s a good idea to take some safety precautions first. Wear gloves and goggles to protect yourself—better safe than sorry, right?
Now, when it comes to connecting the cables, it’s really important to do it the right way to avoid any accidents. Let’s walk through the proper steps to get those connections just right!
Safety First Steps
When connecting the charger to your battery, it’s essential to prioritize safety to prevent accidents. Here are some key steps to guarantee battery safety:
- Read the Manual: Always check the Schumacher manual for specific safety guidelines.
- Inspect Equipment: Before use, examine the charger and cables for any damage to ensure proper maintenance.
- Wear Protective Gear: Use gloves and goggles to protect yourself from potential leaks or sparks.
- Work in a Ventilated Area: Make sure you’re in a well-ventilated space to avoid inhaling harmful gases that batteries might emit.
Proper Cable Connections
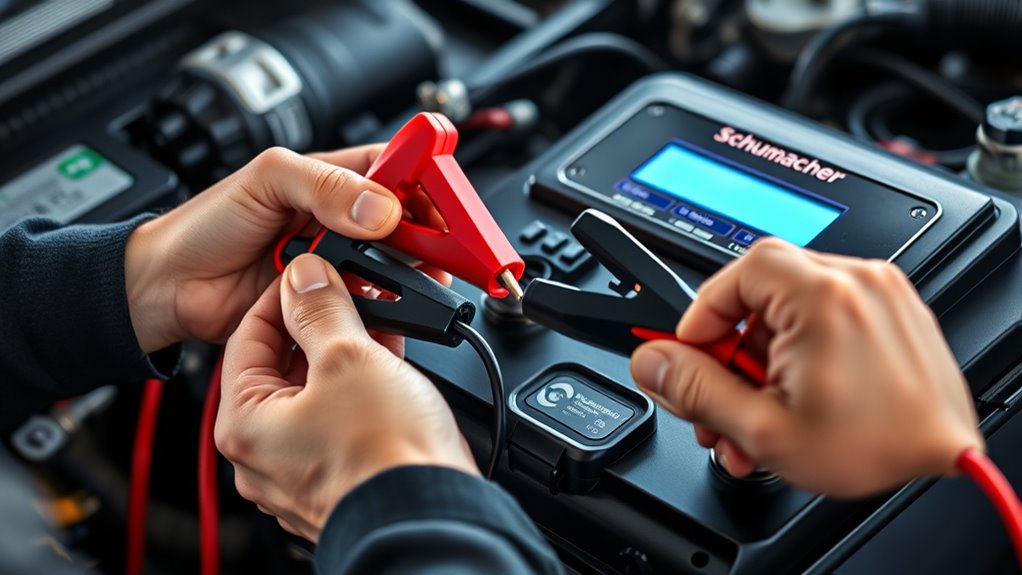
Now that you’ve taken the necessary safety precautions, it’s time to connect the Schumacher battery charger to your battery. Start by verifying you’re using the appropriate cable gauge for your battery. A thicker gauge is often better for higher current applications.
First, attach the red clamp to the positive terminal of the battery. Make sure it’s secure and free from corrosion. Next, connect the black clamp to the negative terminal. If your battery is installed in a vehicle, you may want to connect this clamp to a metal ground instead.
Always follow the correct connection order to prevent sparks. Once everything’s connected, double-check your work before plugging in the charger to verify a safe and efficient charging process.
Selecting the Correct Charge Mode
How can you guarantee your battery charges efficiently? The key is choosing the right charge mode. Using the best settings for your Schumacher battery charger ensures your battery gets the correct type of charge.
Here’s how to pick the right mode:
- Standard Charge: Use this for regular batteries that need a full charge.
- Fast Charge: Choose this for a quick boost, perfect in emergencies.
- Maintenance Mode: Activate this for long-term storage to keep your battery topped off without overcharging.
- AGM Mode: Use this for absorbed glass mat batteries, which need a special charging approach.
Monitoring the Charging Process
While you’ve chosen the right charge mode, it’s important to keep an eye on the charging process to ensure your battery stays healthy. Use the monitoring indicators on your Schumacher charger to see the current charge status. These indicators give you real-time updates on voltage levels and how long the charging has been going on.
Pay attention to how the battery is performing, as any unusual signs could indicate a problem. Regularly check the temperature because overheating can damage the battery. If your charger has safety alerts, make sure to respond to them quickly—they’re there to protect both your battery and the charger.
Best Practices for Using a Schumacher Charger
When you’re using a Schumacher charger, safety is always the top priority. It’s really important to make sure you connect everything properly so you don’t run into any accidents or issues. Taking a little extra time to double-check your connections can make a big difference.
And don’t forget about regular maintenance! Keeping your charger in good shape helps it work more efficiently and lasts longer. Just a bit of routine care can ensure you’re always ready to go when you need it.
Safety Precautions First
Before you start using your Schumacher battery charger, it’s important to prioritize safety. Here are some key precautions to keep in mind for maximum battery safety:
Read the Manual: Take time to familiarize yourself with the charger’s instructions and specifications. Knowing how it works helps prevent accidents.
Wear Protective Gear: Always use safety goggles and gloves. They protect you from potential sparks or acid splashes.
Work in a Ventilated Area: Make sure you’re in a well-ventilated space. Proper airflow helps prevent gas buildup from the battery.
Inspect Cables: Check your cables for frays or damage before connecting. This helps avoid electric shock or short circuits.
Proper Connection Technique
To guarantee a successful charging experience with your Schumacher battery charger, follow these connection techniques closely. Start by making sure the charger is unplugged before you do anything.
Connect the red positive clip to the positive terminal of the battery first. Then, attach the black negative clip to the negative terminal. If the battery is in a vehicle, connect the other end of the black clip to a grounded metal surface away from the battery. This helps reduce the risk of sparks.
Once everything is connected, double-check your cables to avoid tangling or interference during charging. Finally, plug in the charger and select the appropriate settings.
Regular Maintenance Tips
Maintaining your Schumacher battery charger is key to making sure it lasts longer and works well. Regular upkeep can help you avoid problems and keep things running smoothly.
First, always check that all cables are clean and securely connected before you start charging. It’s a simple step that makes a big difference.
Next, keep an eye on how often you charge your battery. Overcharging can cause issues, so check the voltage to figure out the right timing for charging.
When you’re not using the charger, store it in a cool, dry place. This helps prevent damage and keeps it ready to go when you need it.
Finally, regularly inspect the cables and connectors for any signs of wear or damage. Replace any parts that look worn out to keep everything working safely.
Troubleshooting Common Charging Issues
Have you ever run into issues while charging your battery with a Schumacher charger? If it’s not working as expected, start by checking the connections. Make sure the clamps are securely attached to the battery terminals—red to positive and black to negative.
Next, look at the battery’s health. A degraded battery might not charge well, so consider testing it with a multimeter. If the charger’s indicator lights don’t turn on, it could be a blown fuse or an internal problem with the charger.
Also, verify the power source. Plug another device into the outlet to see if it’s working. If you’re still having trouble, check the display for error codes, which can point you to the specific issue.
Keeping these tips in mind can help you charge more efficiently and extend the life of both your charger and battery.
When Should You Call a Professional?
When should you consider calling a professional for your Schumacher battery charger? If you encounter any of these situations, it’s time to seek help:
- Frequent Charging Issues: If your battery won’t hold a charge despite regular maintenance, a professional can assess the problem.
- Visible Damage: Noticing cracks or frayed wires on the charger? It’s important to get it checked to prevent potential hazards.
- Unusual Sounds or Smells: Burning smells or strange noises during charging could mean a serious issue that needs expert attention.
- Shortened Charger Lifespan: If your charger fails sooner than expected, an expert can diagnose faults and advise on proper care.
Ignoring these signs can lead to bigger problems down the road, so don’t hesitate to reach out for professional help when needed.
Essential Tips for Long-Lasting Battery Health
To guarantee your Schumacher battery lasts as long as possible, it’s essential to follow some important care tips. First, establish good maintenance habits. Regularly check the battery terminals for corrosion and clean them if needed.
Proper charging techniques also play a critical role. Avoid overcharging, as this can shorten your battery’s lifespan. Always use the recommended charger settings and disconnect the charger once the battery is fully charged.
Environmental factors can greatly affect battery health too. Store your battery in a cool, dry place away from extreme temperatures. High heat can cause damage, while freezing conditions can drain your battery.
If you know you won’t use your battery for a while, consider using a trickle charger. It helps maintain the charge without overloading the battery. By following these tips, you’ll improve your battery’s longevity and overall performance.
How to Safely Disconnect the Charger
When you’re ready to unplug the Schumacher charger, it’s really important to put safety first. Take a moment to make sure you’re following the right steps for disconnecting the cables and storing the charger properly. Doing this not only keeps you safe but also helps your battery last longer.
Safety First Steps
Disconnecting your Schumacher battery charger safely is important to prevent damage to both the charger and the battery. Follow these steps for effective battery safety and charger maintenance:
- Turn Off the Charger: Make sure the charger is powered down before you disconnect it.
- Remove from Power Source: Unplug the charger from the wall outlet to eliminate any risk.
- Inspect the Cables: Check for frays or damage to help keep everything working safely and last longer.
- Store Properly: Once disconnected, store the charger in a dry, cool place to prevent deterioration.
Disconnecting the Cables
After you’ve safely powered down and unplugged your Schumacher battery charger, it’s time to disconnect the cables. Start by removing the negative (black) cable first, which helps prevent any accidental short circuits. Gently pull the clamp off the battery terminal and set it aside.
Next, remove the positive (red) cable in the same manner. This sequence guarantees safety and proper cable management. While disconnecting, check the cables for any damage; this is important for maintaining your charger.
Once the cables are off, neatly coil them to prevent tangling. Proper handling keeps your workspace organized and your charger in good shape for future use. Remember, a little care goes a long way in keeping your charger in great condition.
Storing the Charger Properly
To store your Schumacher battery charger properly, start by making sure it’s completely powered down and unplugged.
Follow these tips for ideal storage:
- Use Protective Casing: Put the charger in a protective casing to keep dust and damage away.
- Control Humidity: Store it in a dry place to prevent moisture issues.
- Manage Temperature: Keep it in a spot with stable temperatures and avoid extremes.
- Prioritize Battery Safety: Regularly check the charger for wear and tear to keep it safe for future use.
Frequently Asked Questions
Can I Use a Schumacher Charger on All Battery Types?
You can’t use a Schumacher charger on all battery types. It’s important to check if your battery is compatible before plugging it in.
Most Schumacher chargers are made for lead-acid and AGM batteries, but some models have smart technology that adapts to different types. Always read the user manual to understand your charger’s features.
This way, you’ll know how to use it correctly and avoid damage. Taking these steps can help extend the life of your batteries and keep everything running smoothly.
How Long Does It Take to Charge a Battery Fully?
Charging a battery fully can feel like waiting for a glacier to melt! Typically, it takes anywhere from a few hours to overnight, depending on the battery capacity and the charger’s charging speed.
Smaller batteries charge quicker, while larger ones can take longer. Always check your charger’s specifications to get a better idea of how long you’ll be waiting.
With patience, you’ll have that battery ready to go before you know it!
Is It Safe to Charge a Battery Indoors?
Yes, it’s generally safe to charge a battery indoors, but safety should always come first. Make sure you have good ventilation to avoid the buildup of any harmful gases.
Keep the charger on a flat, stable surface and away from anything flammable. Always watch the charging process and don’t use damaged chargers or batteries.
If you notice strange smells or heat, unplug the charger right away to prevent accidents. Stay cautious and safe while charging!
What Should I Do if the Charger Won’t Turn On?
If your charger won’t turn on, don’t panic; it might just need some troubleshooting. First, check the power source—make sure it’s plugged in and working.
Inspect the cables for damage and verify they’re securely connected. Regular charger maintenance like cleaning terminals and avoiding moisture can prevent issues.
If it still won’t power up, consider consulting the user manual or reaching out to customer support for help.
Can I Leave the Charger Connected Overnight?
Yes, you can leave the charger connected overnight, but make sure to follow safety precautions. Before doing so, check the charging indicators to ensure the battery isn’t overcharged. Most modern chargers have an automatic shut-off feature, but it’s still a good idea to keep an eye on it, especially if it’s your first time.
Also, avoid leaving the charger in extreme temperatures and make sure it’s in a well-ventilated area for added safety. This helps prevent any potential hazards and keeps everything running smoothly.
Conclusion
In wrapping up, using a Schumacher battery charger isn’t just about reviving a dead battery; it’s like bringing a dormant engine back to life, ready to roar again.
By following the steps outlined, you ensure a smooth and safe charging experience. Remember, a well-maintained battery can support you through countless journeys.
So, treat it right, and it’ll keep you on the road, powering your adventures for miles to come.