Master Your Schumacher Battery Charger: A Quick Guide to Reading
Many people struggle with properly using their Schumacher battery charger, unsure if they’re doing it right or missing important steps. You’re not alone—getting the hang of it can be tricky at first, but with a little guidance, you’ll be charging like a pro in no time.
To master your Schumacher battery charger, start by connecting it correctly: turn it off, guarantee ventilation, and attach red and black clamps to the respective battery terminals.
Pay attention to indicator lights—red means charging, green signals it’s full, while yellow requires maintenance. Choose the right mode for your battery type to optimize performance.
Keep an eye on voltage readings for battery health, and always inspect connections. There’s more to investigate to improve your charging experience!
Key Takeaways
- Connect the charger correctly by attaching the red clamp to the positive terminal and the black clamp to the negative terminal or a grounded surface.
- Watch the indicator lights: a red light means charging, green shows it’s fully charged, and a flashing red indicates a connection problem.
- Pick the right charging mode for your battery type, like regular for cars or maintenance mode for deep-cycle batteries.
- Keep an eye on the voltage readings and indicator lights to monitor progress and troubleshoot any issues.
- Take care of your charger by checking the connections, avoiding overheating, and storing it in a cool, dry place after you’re done.
How to Connect Your Schumacher Charger Correctly
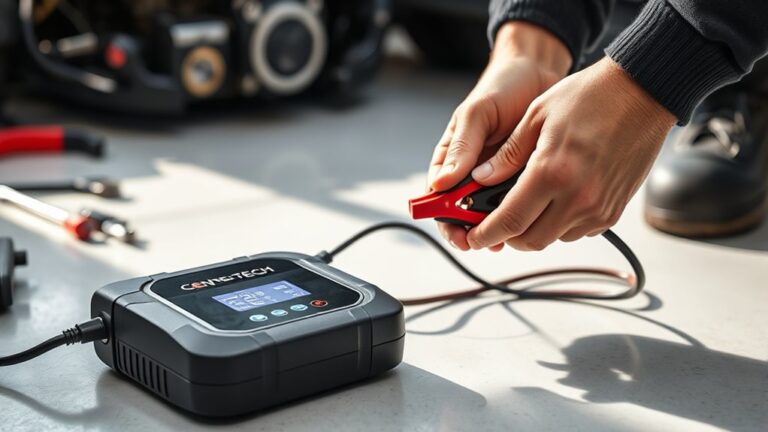
Connecting your Schumacher charger correctly is key for safe and efficient charging. Start by turning off the charger and making sure you’re in a well-ventilated area.
Identify the positive and negative battery terminals, usually marked with plus (+) and minus (−) symbols. Attach the red clamp to the positive terminal of the battery, ensuring it’s secure.
Next, connect the black clamp to the negative terminal. If you’re charging a vehicle, it’s better to attach the black clamp to a grounded metal surface instead of directly on the battery.
Always double-check your connections before turning on the charger. Remember to follow safety precautions, like wearing gloves and safety goggles, to protect yourself from sparks or battery acid.
Once everything’s connected, you can safely turn on your charger and monitor the charging process.
Decoding Charger Indicator Lights: What Each Color Means
After you’ve made the right connections for your Schumacher charger, understanding the indicator lights helps you keep track of the charging process easily. Each light has a specific meaning, and knowing the color codes can save you time and confusion.
| Indicator Light | Color | Function |
|---|---|---|
| Charging | Red | The battery is currently charging. |
| Fully Charged | Green | The battery is fully charged and ready to use. |
| Error | Flashing Red | There’s an issue with the connection or battery. |
Choosing the Right Mode for Your Schumacher Battery Charger
When you’re ready to charge your battery, choosing the right mode on your Schumacher charger is essential for the best performance. The mode you select can significantly impact how efficiently your battery charges.
Depending on the type of battery—like lead-acid, AGM, or gel—you’ll want to pick a mode that provides the ideal charging conditions. For example, if you’re charging a standard automotive battery, the regular mode usually works best.
For deep-cycle batteries, using the maintenance or trickle mode can help prevent overcharging. Always check your user manual to understand the different modes and their specific uses.
Choosing the correct mode not only extends your battery’s lifespan but also keeps the charging process safe. Remember, selecting the right charger mode is key to getting the most out of your battery’s performance and longevity.
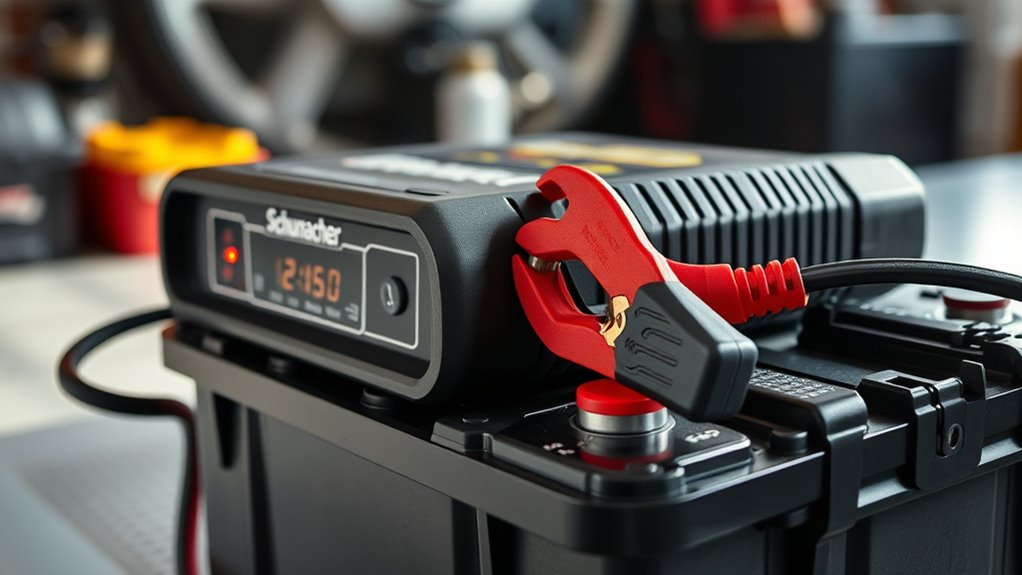
How to Monitor Charging Progress
Want to keep an eye on your Schumacher battery charger and make sure everything’s running smoothly? The best way is to watch those charge indicator lights—they’ll tell you what’s going on at a glance. Getting familiar with what each light means can really help you understand the progress of your battery’s charge.
Besides the lights, checking the voltage readings can give you a more precise idea of how much charge your battery has received. And don’t forget about tracking the charging time—sometimes, just knowing how long it’s been charging can tell you a lot about whether your battery is fully topped off or still needs a bit more time. Putting all these pieces together will help you keep your battery in top shape and avoid any surprises.
Understanding Charge Indicator Lights
Have you ever wondered how to tell if your Schumacher battery charger is working properly? Understanding the charge indicator lights makes it easy to monitor your charging progress. Each light has a specific purpose, helping you with maintenance and troubleshooting.
Here’s a quick reference:
| Light Color | Meaning | Action Needed |
|---|---|---|
| Green | Fully Charged | Disconnect the charger |
| Red | Charging | Wait for it to finish |
| Flashing Yellow | Error or Fault | Check your connections |
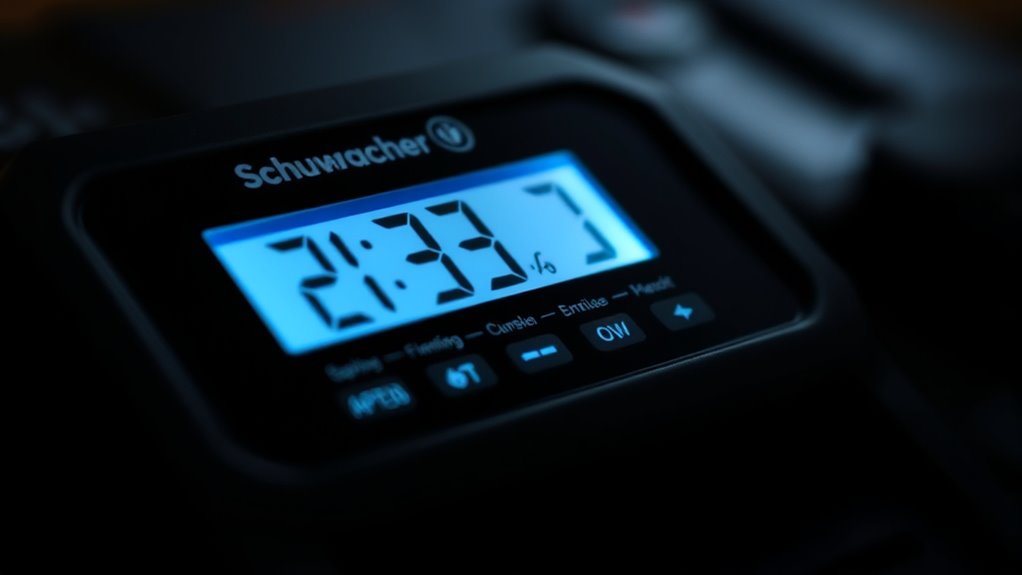
Interpreting Voltage Readings
While understanding charge indicator lights is important, looking at voltage readings gives you a deeper look into your battery’s charging progress. Monitoring these fluctuations helps you see how well your Schumacher charger is working.
A fully charged battery usually reads around 12.6 volts or higher. If the voltage is lower, it means your battery’s capacity is diminished. Keep an eye on the voltage as it rises during charging; it should steadily increase.
If you notice the voltage fluctuating erratically, it could be a sign of a problem with the charger or the battery itself. Knowing what these readings mean helps you decide when to disconnect the charger, keeping your battery healthy and ready to use.
Monitoring Charging Time
One key aspect of using your Schumacher battery charger is monitoring the charging time to guarantee efficiency.
By keeping an eye on how long it takes, you can make sure your battery gets the best charge without overdoing it.
Most Schumacher chargers have an indicator that shows the current status of the battery, so you can easily track progress.
When it’s fully charged, the indicator will usually show that, allowing you to disconnect promptly.
This not only helps preserve battery efficiency but also extends the lifespan of your battery.
Make it a habit to check the indicator regularly, and you’ll get the most out of your charging.
Efficient monitoring really makes a difference in performance!
Troubleshoot Common Charger Issues
Having trouble with your Schumacher battery charger? No worries, let’s walk through some simple troubleshooting steps. First, take a look at the display to see if any error codes pop up. Those codes can give you a pretty good clue about what’s going wrong.
Then, make sure the power supply is working properly. Check that the outlet is active and providing the correct voltage—that way, you can rule out any power issues before diving deeper.
Identify Error Codes
Error codes on your Schumacher battery charger can quickly signal common issues, helping you troubleshoot effectively. Familiarizing yourself with these error code meanings is important for a smooth charging experience. Here are some tips to get you started:
- Error Code 1: Means there’s a bad battery connection. Check your cables and make sure they’re secure.
- Error Code 2: Indicates the battery is too low to charge. Try jump-starting the battery or replacing it if needed.
- Error Code 3: Signals the charger is overheating. Let it cool down before trying again.
Check these codes regularly, and you’ll be better at fixing issues quickly. This way, your charger will stay in top shape and work effectively.
Check Power Supply
Checking the power supply is essential for troubleshooting common charger issues. Start by making sure your charger is plugged into a working power source.
If you’re using an extension cord, verify it’s in good condition and rated for your charger’s power needs. Then, inspect the power outlet and try another one if needed.
Always prioritize safety — disconnect the charger before making any checks or adjustments. If the indicator lights don’t turn on, it could mean a faulty charger or an internal problem.
For peace of mind, test the charger with a different battery to rule out battery-related issues.
Essential Tips for Prolonging Your Battery Life
To ensure your battery lasts as long as possible, it’s important to follow a few simple tips. These small habits can make a big difference in extending your battery’s lifespan.
First, always charge your battery in a cool, dry place. Extreme heat or cold can damage the battery and make it less efficient over time.
Always charge your battery in a cool, dry environment to prevent damage and maintain efficiency.
Next, avoid overcharging. Once your battery hits 100%, unplug your charger to prevent overheating and unnecessary wear.
Finally, regularly check that all connections are clean and secure. Loose or dirty connections can cause inefficient charging and potentially harm your battery.
How to Store Your Schumacher Charger Properly
When you’re done using your Schumacher charger, proper storage is key to keeping it working well and lasting a long time. First, make sure it’s unplugged and completely cool before storing it.
Keep it in a clean, dry place away from extreme temperatures and moisture. The best storage conditions are between 50°F and 85°F, which helps protect the internal parts.
Don’t put the charger in a damp garage or in direct sunlight, as that can shorten its lifespan. For extra protection, consider using a padded case or storing it in its original packaging.
Regularly check the charger for frayed wires or any damage before each use. And keep the user manual nearby for any specific storage tips.
Upgrading Your Charging Experience With Accessories
While you might think your Schumacher charger is complete on its own, adding accessories can really improve your charging experience. Choosing the right accessories can boost both efficiency and convenience.
Enhance your Schumacher charger with accessories for improved efficiency and convenience in your charging experience.
Here are three essential charging accessories to consider:
Smart Battery Maintainer: This keeps your battery at the perfect charge without overloading it, helping to extend its lifespan.
Extension Cords: A heavy-duty extension cord makes it easier to reach distant outlets, especially in tight spaces.
Battery Terminal Clamps: Upgrading to high-quality clamps improves connectivity and ensures reliable charging, even in tough conditions.
Frequently Asked Questions About Schumacher Battery Chargers
Got questions about your Schumacher battery charger? You’re definitely not alone—lots of folks run into similar charging issues and often wonder what those indicator lights are trying to tell them. Don’t worry, though! We’re here to clear things up and help you make the most of your charger.
Common Charging Issues
Understanding common charging issues can help you troubleshoot your Schumacher battery charger more easily. Here are three common problems you might run into:
- Inadequate Power Supply: Make sure your outlet is working properly. Test other devices to see if it’s a power issue.
- Faulty Connections: Check the clamps and cables. Ensure they’re firmly attached to both the battery and the charger.
- Battery Condition: Old or damaged batteries may not charge well. Regularly check your battery’s health as part of your maintenance routine.
Always follow safety precautions when troubleshooting. These steps can save you time and frustration, making sure your charger works when you need it most.
Indicator Light Meanings
When you’re using a Schumacher battery charger, the indicator lights can give you important info about the charging process. Knowing what these lights mean can help you keep an eye on your battery’s health and make sure you’re maintaining it properly.
Here’s a quick reference table to make things simple:
| Light Color | Meaning | Action Needed |
|---|---|---|
| Green | Fully Charged | Disconnect the charger |
| Red | Charging in Progress | Keep charging |
| Yellow | Maintenance Needed | Follow maintenance tips |
Common Mistakes to Avoid When Using Your Charger
While using your Schumacher battery charger might seem simple, many users make mistakes without realizing it. These errors can affect how well your charger works or even harm your batteries. To help you avoid these issues, here are some common mistakes to watch out for:
Using your Schumacher battery charger may appear straightforward, but many users unknowingly make mistakes that can hinder performance or damage batteries.
- Ignoring Charging Myths: Don’t believe the myth that you can overcharge a modern battery. Schumacher chargers are built to prevent this, but it’s still a good idea to keep an eye on the charging process.
- Neglecting Maintenance Tips: Make sure to check your charger regularly for dust or corrosion. Keeping it clean helps it work at its best and lasts longer.
- Using the Wrong Setting: Always choose the right charging mode for your battery type. Using the wrong setting can lead to inefficient charging or even damage your battery.
Frequently Asked Questions
Can I Use My Schumacher Charger in Extreme Temperatures?
You shouldn’t use your Schumacher charger in extreme temperatures, as temperature effects can impact its performance and safety.
If it’s too hot or too cold, the charger might not work properly and could even damage your battery.
For safe charging, always stay within the recommended temperature range, usually between 32°F and 104°F.
Sticking to this range helps ensure efficient charging and helps your charger and battery last longer.
How Long Does It Take to Fully Charge a Battery?
Charging time varies, but it typically takes about 4 to 12 hours to fully charge a battery, depending on its capacity. Imagine the peace of mind you’ll feel knowing your vehicle’s ready to go!
If you’re using a Schumacher charger, keep in mind that larger batteries may take longer, while smaller ones might charge faster. Patience pays off in terms of ensuring your battery’s longevity and reliability during those essential moments.
Is It Safe to Leave the Charger Connected Overnight?
Yes, it’s generally safe to leave your charger connected overnight, but always prioritize charger safety. Most modern chargers have built-in mechanisms to prevent overcharging, so your battery shouldn’t get damaged.
However, it’s a good idea to check your charger’s specifications and guidelines just to be sure. If you’re using an older model, it’s better to monitor the charging process or disconnect it once it’s fully charged to avoid any risks.
Stay informed about the best ways to care for your battery to keep it healthy and safe.
What Batteries Are Compatible With Schumacher Chargers?
Choosing the right companion for your journey is essential, just like selecting compatible batteries for your Schumacher charger.
You can confidently use lead acid batteries, including AGM and gel types. If you’re exploring new horizons, some Schumacher chargers also support lithium batteries.
Always check your charger’s specifications to guarantee a seamless fit, just as you’d confirm a reliable map for your travels.
Stay charged and ready for whatever adventure awaits you!
How Do I Reset My Schumacher Battery Charger?
To reset your Schumacher battery charger, start by unplugging it from the power source. Wait about 10 seconds before plugging it back in.
Check the display for any error codes. If you see any, follow the troubleshooting steps in your manual.
If the problem continues, you may need to look up reset instructions specific to your model. This process usually clears minor faults and helps your charger work again.
Conclusion
So, you’ve mastered your Schumacher battery charger—congrats! You’re now ready to tackle the world of charging with the finesse of a seasoned pro.
Just remember, it’s not rocket science. It’s more like watching paint dry, but with more flashing lights.
If you can dodge common mistakes and avoid turning your vehicle into a 21st-century paperweight, you’re all set.
After all, who needs a degree in electrical engineering when you’ve got a colorful array of indicator lights to guide you?
Master Your Schumacher Battery Charger: A Quick Guide to Reading