7 Easy Steps to Charge a Lawn Mower Battery With a Charger
Many lawn enthusiasts know the frustration of a dead or weak mower battery, especially when you’re eager to get your yard looking pristine. If you’ve ever struggled to bring your mower back to life, you’re not alone.
Charging your lawn mower battery properly can seem tricky, but with a few simple steps, you’ll have it running smoothly again.
To charge your lawn mower battery, first, gather your essential tools like a battery charger, gloves, and safety goggles.
Place the mower on a flat surface, turn it off, and disconnect the battery cables. Clean any corrosion, then connect the charger’s clips to the appropriate terminals.
Monitor the charging status and voltage until it’s full. Finally, safely disconnect the charger, starting with the negative terminal.
Follow these steps to guarantee your mower’s battery lasts longer and operates reliably!
Key Takeaways
- Make sure the mower is on a flat surface, turned off, and the battery cables are disconnected before you start charging.
- Check the battery for any signs of corrosion or leaks. If needed, clean the terminals with a wire brush.
- Connect the charger by attaching the red clip to the positive terminal and the black clip to the negative terminal.
- Keep an eye on the charging indicators and the battery voltage to make sure everything is charging properly.
- When the battery is fully charged, unplug the charger. Disconnect the negative terminal first, then the positive.
Why a Charged Lawn Mower Battery Is Essential
A charged lawn mower battery is essential because it guarantees your mower starts reliably when you need it. You don’t want to face a stubborn mower on a sunny Saturday morning. Proper battery maintenance is key to ensuring your mower runs smoothly. This includes regularly checking the battery’s water levels and cleaning any corrosion from terminals.
Knowing the right charging frequency can make a big difference. If you mow often, consider charging your battery every few weeks, especially during the mowing season. If your mower sits idle for long periods, a monthly charge can help keep it in good shape.
Essential Tools You Need to Charge Your Lawn Mower Battery
To charge your lawn mower battery effectively, you’ll need a few essential tools on hand. These items will help ensure proper battery maintenance and make the charging process safer.
Here’s a quick overview of what you’ll need:
| Tool | Purpose |
|---|---|
| Battery Charger | To supply the necessary power |
| Safety Goggles | To protect your eyes while handling |
| Gloves | For safe and clean handling |
| Multimeter | To check the battery’s voltage and condition |
| Wire Brushes | To clean the battery terminals |
Having these tools ready makes the process smoother and safer. Remember, proper battery care helps extend your mower’s battery life. Invest in quality equipment and always prioritize safety when charging.
With these essentials, you’ll be well-prepared to get the job done right.
Preparing Your Mower and Battery for Charging
Before you start charging your lawn mower battery, make sure both the mower and battery are prepared for a safe and effective process. Start by placing the mower on a flat surface and turning it off.
Next, disconnect the battery cables, beginning with the negative terminal to avoid sparks. Check the battery for any corrosion or leaks, and clean the terminals with a wire brush if needed.
Proper battery maintenance is key, so remove dirt or debris from the terminals to keep everything in good shape.
Then, identify the right charger for your battery. Whether it’s a trickle charger or a smart charger, make sure it matches your battery’s specs.
Always read the user manuals for both the mower and charger for any specific instructions. Preparing everything correctly helps ensure a smooth charging process and can prolong your battery’s lifespan.
How to Connect the Charger: Step-by-Step Guide
Once you’ve prepared your mower and battery, it’s time to connect the charger. First, choose the right charger type for your battery—either a trickle charger or a smart charger. Make sure the charger is off before you start.
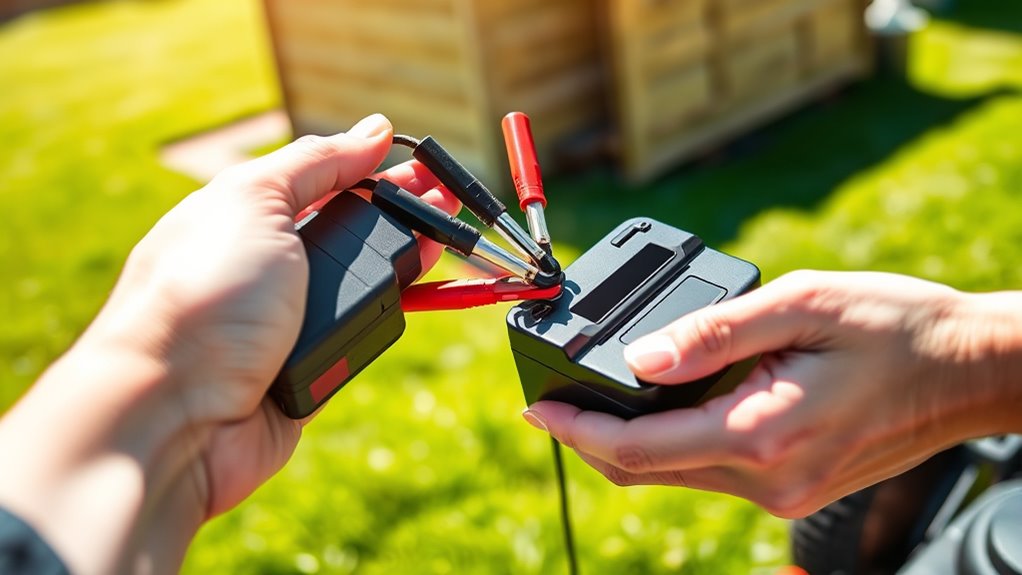
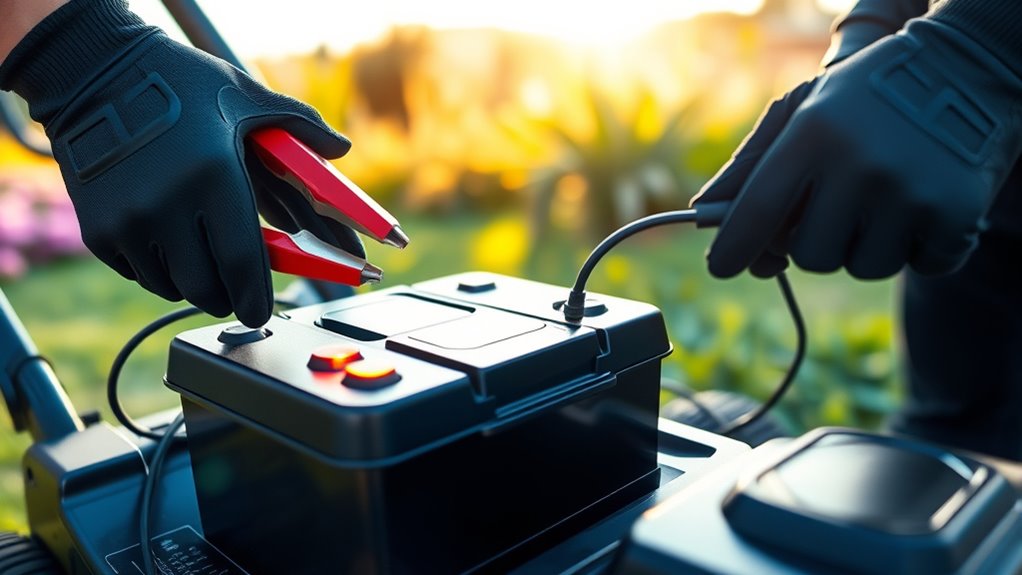
Next, attach the red (positive) clip to the positive terminal on the battery. Then, connect the black (negative) clip to the negative terminal. If your charger has an extra ground clamp, attach it to a metal part of the mower for safety.
Attach the red clip to the positive terminal and the black clip to the negative terminal for safe charging.
Once everything’s connected, plug the charger into an outlet and turn it on. During this process, double-check that the clips are secure and that there are no obstructions. This simple step is essential for effective battery maintenance.
Remember to follow the manufacturer’s instructions for the best results. This will help ensure your mower’s battery stays healthy and ready for use!
How to Monitor Charging Effectively?
After connecting the charger, it’s important to keep an eye on the charging process to make sure your lawn mower battery gets the care it needs. Start by checking the charging indicators on your charger. These lights will tell you if the battery is charging, fully charged, or if there’s an issue. A steady green light usually means everything’s working well.
Next, if your charger allows, monitor the battery voltage. The voltage should gradually increase as the battery charges. If you notice the voltage staying the same or dropping, it could be a sign of a problem with the battery or charger.
Make it a habit to check on your battery periodically during charging. This helps you catch any issues early and ensures your battery stays in good condition. Staying attentive will help prolong the life of your lawn mower battery and keep it ready when you need it.
How to Safely Disconnect the Charger and Reinstall Your Battery
To safely disconnect the charger and reinstall your lawn mower battery, start by unplugging the charger from the outlet. Once that’s done, carefully remove the charger clamps from the battery terminals.
Always disconnect the negative (-) terminal first, followed by the positive (+) terminal to avoid sparks. This order helps prevent any accidental short circuits.
Always disconnect the negative (-) terminal first, then the positive (+) to avoid sparks and prevent accidental short circuits.
Next, check the battery for signs of corrosion or damage. Proper maintenance is key. If you see corrosion, clean it off with a mixture of baking soda and water before moving on.
Now it’s time to reinstall the battery. Place it securely in its compartment, making sure the terminals line up correctly with the connectors.
Connect the positive (+) terminal first, then the negative (-) terminal. Follow safety precautions to prevent any accidental sparks or short circuits.
Finally, double-check that all connections are tight and secure before closing the battery compartment. This ensures everything is safe and ready to go.
Tips for Extending Your Lawn Mower Battery Life
Maintaining your lawn mower battery doesn’t end with just installing it properly; you also need to take steps to make it last longer. Start by doing regular battery maintenance. Keep the terminals clean and free from corrosion, as this can really affect how well it works. If you have a maintenance-free battery, check the water level and add distilled water when needed.
Next, pay attention to how often you charge it. Avoid letting the battery completely drain before recharging because that can shorten its life. Instead, charge it after every use or at least once a month during the off-season.
Storing your battery in a cool, dry place is also important. If you’re not using your mower for a while, consider using a trickle charger to keep it charged without overdoing it. Follow these tips, and your lawn mower battery will stay strong and reliable for years to come.
Frequently Asked Questions
Can I Charge My Lawn Mower Battery Indoors?
Yes, you can charge your lawn mower battery indoors, but safety is really important. Make sure the space is well-ventilated to prevent any buildup of gases, which can be dangerous.
Keep the charger away from flammable materials and avoid charging near water sources. Always keep an eye on the process and unplug the charger once the battery is fully charged.
Following these simple precautions will help you charge your battery safely indoors.
How Long Does It Take to Fully Charge a Lawn Mower Battery?
It usually takes around 4 to 12 hours to fully charge a lawn mower battery, depending on its size and the type of charger you’re using.
For the best battery maintenance, check the manufacturer’s guidelines, as they’ll give you specific charging time recommendations.
If you’re using a fast charger, you might get the job done quicker, but be careful not to overcharge.
Make sure to regularly monitor your battery’s condition to keep it working well and lasting longer for your lawn care needs.
Is It Safe to Use a Car Battery Charger?
Yes, it’s generally safe to use a car battery charger for your lawn mower battery, but you should take some safety precautions. Make sure you’re using the right type of charger, ideally one with a lower amperage setting.
Before connecting, check the battery’s voltage and make sure the charger matches. Always wear gloves and goggles, and never charge a damaged battery.
Following these steps will help keep everything safe and sound while you’re charging.
What Should I Do if the Battery Won’t Charge?
If your battery won’t charge, start by checking the connections for corrosion or loose wires. Clean them if needed.
Then, make sure the charger’s settings are correct. If the battery still doesn’t respond, it might be time to troubleshoot.
Try testing the battery voltage or looking for internal damage.
Can I Jump-Start My Mower With a Car Battery?
Jump-starting your mower with a car battery can feel like giving it a quick boost, but you need to be careful. First, check the battery types because some mowers use sealed batteries that aren’t compatible.
Always follow safety precautions: wear gloves and goggles, and make sure both batteries are off before connecting the cables. If you do it right, you can get your mower running again without any trouble!
Conclusion
Charging your lawn mower battery doesn’t have to be a hassle. With just a few simple steps, you can ensure your mower starts smoothly every time.
Did you know that a well-maintained battery can last up to 4 years? That’s like getting an extra season of perfectly manicured grass!
Follow these easy steps to take good care of your battery. Proper maintenance helps keep your mower reliable and ready to go.
By properly charging and caring for your lawn mower battery, you’ll enjoy a dependable mower for years to come. Happy mowing!