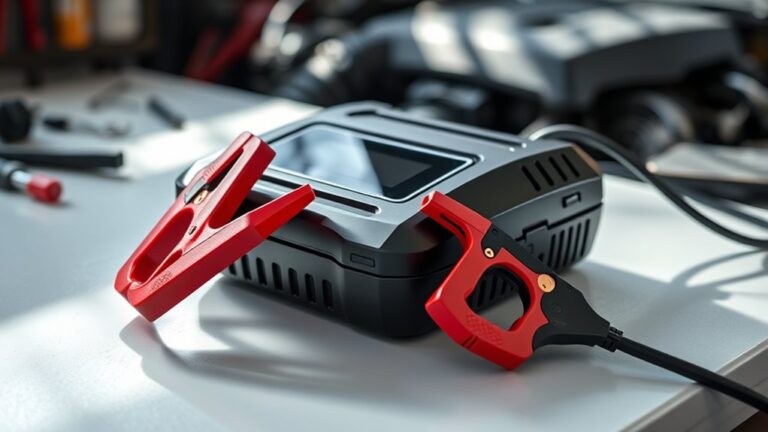
How to Reset Ryobi Battery Charger: Simple Guide
Are you tired of dealing with a Ryobi battery charger that just won’t work? You’re not alone—many people struggle with charger issues that seem to pop up out of nowhere.
Luckily, resetting your Ryobi battery charger can often fix the problem and get your power tools back in action.
To reset your Ryobi battery charger, unplug it from the wall and wait 10 seconds before plugging it back in. If your charger has a reset button, press and hold it for a few seconds.
Check the LED indicators to see if they’re functioning properly. If the charger still doesn’t work as expected, further troubleshooting steps can help you pinpoint the issue and get your charger back to normal.
Key Takeaways
- Unplug the charger for 10 seconds, then plug it back in to reset its internal system.
- If your charger has a reset button, press and hold it for a few seconds to clear any false signals.
- After resetting, check the status LED indicators to see if they show normal functionality.
- Make sure all connections are secure and look for any physical damage or debris on the charger.
- If problems continue, refer to the user manual or contact Ryobi support for help.
Common Reasons to Reset Your Ryobi Battery Charger
When your Ryobi battery charger isn’t working properly, resetting it can often fix the problem. One common reason to reset is if it’s not compatible with your specific battery model.
Using the wrong charger can cause inefficiencies that shorten your battery’s lifespan or make it charge improperly. Another reason to consider a reset is if the charger indicator lights start acting strangely. This could be a temporary glitch that a reset can fix.
If you’ve recently experienced power fluctuations or outages, your charger might need a reset to recalibrate itself. Finally, overcharging the batteries repeatedly can cause performance issues, and resetting can help restore normal operation.
Signs Your Ryobi Battery Charger Isn’t Working
If your Ryobi battery charger isn’t working right, it’s important to spot the signs early. Recognizing these issues can help you fix them before they harm your battery or the charger itself.
One clear sign is No Indicator Lights. If the lights don’t turn on when you plug in the charger, something’s likely wrong.
A key warning sign is No Indicator Lights; if the charger’s lights don’t illuminate, it likely indicates a malfunction.
Another sign is Inconsistent Charging. If your battery only charges sometimes or not at all, the charger might be failing.
You should also watch out for Overheating. If the charger gets unusually hot while in use, it could be a sign of a problem.
Paying attention to these signs can help keep your battery working efficiently and extend the life of your charger. Acting quickly to fix issues can save you both time and money later on.
How to Reset Your Ryobi Battery Charger: A Step-by-Step Guide
Having trouble with your Ryobi battery charger? Don’t worry, it’s pretty common, and the good news is that resetting it can often do the trick. Usually, it’s a simple fix that can bring your charger back to life without much hassle. So, let’s go through the easy steps to get your charger up and running again.
Common Charger Issues
Many users run into common issues with their Ryobi battery chargers that can make charging harder. Knowing these problems can help you keep your charger working well and extend your battery’s life.
One common issue is faulty connections. Loose or damaged cables can stop the charger from working, so it’s a good idea to check your connections regularly.
Overheating is another problem. If your charger gets too hot, it might stop functioning. Make sure to place it in a well-ventilated area to prevent this.
Indicator light problems are also frequent. A blinking or non-responsive light often signals an issue. Check the manual for specific troubleshooting steps.
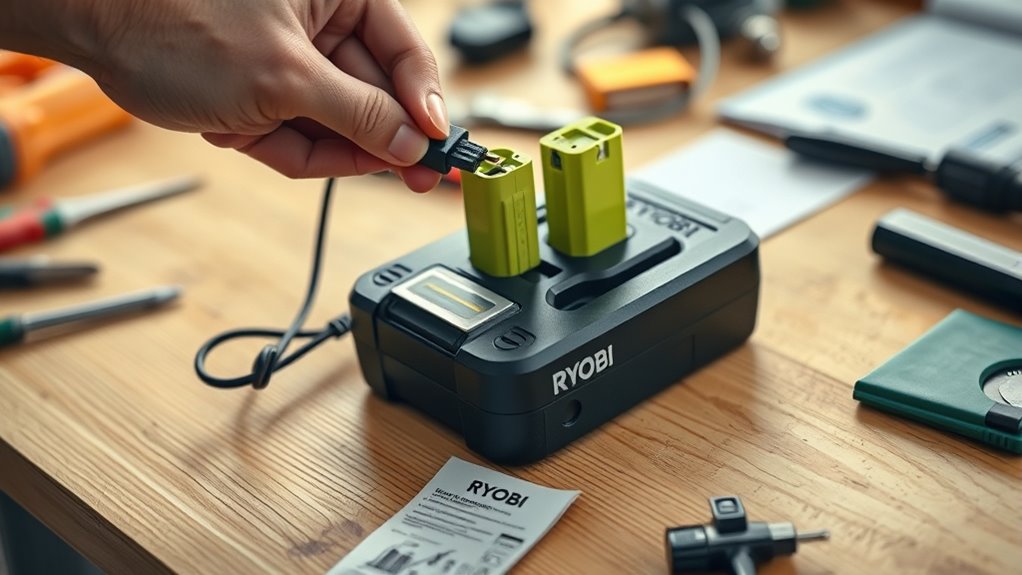
Resetting Process Steps
Resetting your Ryobi battery charger can often fix problems and get it working again. First, unplug the charger from the wall outlet. Wait about 10 seconds to let any leftover power drain.
Next, plug it back in. If it’s still not working, try the reset steps specific to your model. Some chargers have a reset button—if yours does, press and hold it for a few seconds.
Then, check the status LED indicators. Do some basic troubleshooting by making sure the battery is seated correctly and looking for any visible damage. If issues continue, refer to your user manual or contact Ryobi support for help.
What the Reset Button Does
Pressing the reset button on your Ryobi battery charger can breathe new life into its functionality. This simple action can resolve various issues and improve the overall performance of your charger. Here’s what the reset button does:
- Restores reset button functionality: It helps reinitiate the charger’s internal systems, making sure everything runs smoothly again.
- Resets charging indicator role: The button clears any false signals, so the charging indicators show the correct battery status.
- Prevents overheating: Resetting the charger can help avoid overheating problems that might happen after long use.
Basically, the reset button is a quick fix for minor troubles. It helps keep your charger working well and your batteries charging efficiently. It’s a handy tool to have in your kit, making sure your batteries last longer.
Don’t hesitate to use it whenever you run into issues!
Troubleshooting Common Issues After Resetting Your Ryobi Charger
Even after you’ve reset your Ryobi charger, you might still run into some common issues that can mess with your charging experience. One of the most frequent problems is that the charger doesn’t recognize the battery.
If that happens, check for dirt or debris on the battery terminals. A clean connection is key for the charger to work properly and complete the charging cycle.
Another issue is when the charger shows a full charge, but your battery isn’t actually charged. In this case, try letting the battery sit in the charger a bit longer to see if it really needs more time.
Think about the age of your battery too. Older batteries might not hold a charge like they used to and could need replacing.
If problems keep happening, make sure your charger is plugged into a working outlet. Also, inspect the power cord for any damage that could be causing issues.
How to Maintain Your Ryobi Charger
Want to keep your Ryobi charger working like a champ? The key is to give it some regular TLC. Make sure to clean the contacts now and then — it’s a simple step that can really make a difference in how well it charges your tools.
And don’t forget about storage. Keep the charger in a cool, dry spot away from moisture and extreme temperatures. That way, it stays in good shape and lasts longer. Oh, and try not to overcharge your batteries. Unplugging once your tools are fully charged can help avoid any potential damage and keep everything running smoothly.
Regular Cleaning Practices
Maintaining your Ryobi charger is important for getting the best performance and making it last longer. Regular cleaning is a simple way to keep everything in top shape.
Start by wiping down the outside with a damp cloth to remove dust and dirt. It’s quick and helps keep the surface clean.
Next, check the charging ports for any dirt or corrosion. Gently clean them with a soft brush or some compressed air to keep the connections clear.
Finally, store your charger in a dry place. Keeping it away from moisture helps prevent damage to the internal parts.
Proper Storage Techniques
After keeping your Ryobi charger clean, focusing on proper storage techniques will help improve its longevity and performance. Start by choosing a good spot that’s cool and dry, away from direct sunlight and extreme temperatures.
Make sure the humidity is low to prevent corrosion. Use storage containers that allow proper ventilation, so the charger and batteries can breathe easily. Regularly check the temperature during charging to prevent overheating.
Avoiding Overcharging Risks
While it might seem convenient to leave your Ryobi charger plugged in all the time, doing so can cause overcharging, which may damage both the charger and your batteries. To keep your batteries healthy and make them last longer, it’s important to manage your charging habits.
Here are some simple tips to avoid overcharging:
- Unplug after charging: As soon as your battery hits full capacity, disconnect the charger.
- Monitor charge cycles: Keep an eye on how often you’re charging your batteries. Try to balance your charge cycles to prevent unnecessary wear.
- Use a timer: Setting a timer can remind you to unplug the charger after a few hours, helping you avoid leaving it plugged in too long.
Fixing Other Charging Problems With Your Ryobi Tools
If your Ryobi tools aren’t charging properly, don’t worry—there are some simple troubleshooting steps you can try. First, check your battery maintenance. Make sure the battery terminals are clean and free from debris. Dirt can block the connection and make charging less efficient.
Next, look at the charger itself. Ensure it’s plugged in securely and that the outlet is working. You might want to try plugging it into a different outlet to rule out electrical issues.
If your battery is old, it might not hold a charge well anymore. In that case, consider replacing it. Finally, make sure you’re using the right charger for your specific Ryobi battery model. Using the wrong charger can prevent proper charging.
When Should You Call in a Pro for Your Charger?
When should you consider calling in a pro for your Ryobi charger? If you’ve tried resetting and troubleshooting without success, it might be time to seek professional help. Here are some key signs that you need a pro:
- Your charger shows physical damage like cracks or frayed wires.
- It keeps failing to charge batteries, even after trying multiple ones.
- You hear unusual sounds or see sparks when plugging it in.
In these cases, don’t hesitate to reach out for professional repair. Trying to fix serious issues yourself can cause more damage or safety risks. Sometimes, replacing the charger is the best option, especially if it’s beyond repair.
Quick Fixes for Your Ryobi Charger
Before you call in a pro, there are several quick fixes you can try to get your Ryobi charger working again. First, check the power source. Make sure it’s plugged in securely and that the outlet is working. If you’re using a surge protector, try plugging the charger directly into the wall.
Next, inspect the charger for any visible damage or debris. Clean the contacts carefully, as dirt can affect performance. Also, confirm that the charger is compatible with your battery. Using an incompatible charger can cause problems.
If the charger’s light indicator isn’t working, try resetting it by unplugging and plugging it back in after a few minutes. Finally, practice proper battery maintenance by avoiding overcharging and storing batteries at room temperature. These quick steps might save you time and money before seeking professional help.
Preventing Future Charging Issues With Your Ryobi Tools
To prevent future charging issues with your Ryobi tools, it’s important to establish a regular maintenance routine. Taking proactive steps can really extend your battery’s life and keep your tools working at their best.
First, keep an eye on how often you charge your batteries. Only charge when needed based on your usage to avoid overcharging. This helps maintain battery health over time.
Next, double-check that the battery you’re using is compatible with your Ryobi tools. Using the right batteries prevents operational problems and keeps everything running smoothly.
Finally, pay attention to where you store your batteries. Keep them in a cool, dry place away from extreme temperatures, which can negatively affect their performance and longevity.
Frequently Asked Questions
Can I Use My Ryobi Charger With Other Brands’ Batteries?
You can’t use your Ryobi charger with other brands’ batteries. Ryobi compatibility is specific, and mixing brands can affect battery performance and safety.
Each charger has unique specifications tailored to its battery design. Using a different brand might not provide the correct voltage or charge features.
This could potentially damage both the charger and the battery. It’s best to stick with Ryobi products for the best results and to stay within the brand’s guidelines.
How Long Does a Ryobi Battery Charger Last?
A Ryobi battery charger usually lasts between 3 and 5 years, depending on how often you use and care for it.
For example, if you frequently charge batteries, like in a landscaping business, you might do around 500 charging cycles in a year.
This can impact the lifespan since more cycles tend to cause quicker wear on both the batteries and the charger.
Regular maintenance and proper storage can really help extend its life significantly.
What Should I Do if My Charger Gets Wet?
If your charger gets wet, unplug it immediately to prevent water damage. Don’t try to use it until it’s completely dry.
Wipe off excess water with a cloth, then place it in a warm, dry area for drying. Avoid using heat sources like hair dryers, as they can cause more harm.
Once you’re sure it’s dry, check for any signs of damage before plugging it back in. Stay safe!
Is It Safe to Leave the Charger Plugged In?
It’s generally safe to leave your charger plugged in if you’re following charging safety guidelines.
However, for the best battery health, it’s a good idea to unplug it when you’re not using it. This can help prevent overheating and extend your battery’s lifespan.
If you’re charging multiple batteries, keep an eye on the charger to make sure it’s working properly.
Always check for any signs of damage or wear so you can avoid potential hazards.
Staying proactive is the best way to keep your equipment in top shape!
Can a Faulty Battery Damage the Charger?
Absolutely, a faulty battery can damage the charger. It’s kind of ironic, right? You’d think the charger would be the one causing issues, but it’s usually the battery.
Proper battery maintenance is really important for both your battery and charger’s lifespan. If you notice any swelling or leaks, don’t ignore them.
A bad battery can cause the charger to overheat or malfunction, which might lead to costly repairs or replacements. So, keeping your batteries in good shape saves you money and keeps your charger safe.
Conclusion
To summarize, resetting your Ryobi battery charger can often fix common issues and get your tools back in action. Sometimes, a simple reset is all you need to have your charger working like new.
Have you thought about how a little maintenance can help extend the life of your charger? Regular care can prevent problems before they start and keep everything running smoothly.
By staying proactive and following the tips in this guide, you can avoid future issues. Remember, if problems keep happening, don’t hesitate to seek professional help for peace of mind and better efficiency.