7 Simple Steps to Use a Car Battery Charger
Having a dead car battery can throw off your day and leave you feeling stranded. Many people struggle with knowing how to safely jump-start or charge their batteries without causing damage or risking safety.
To use a car battery charger, start by checking the battery’s condition and gathering safety gear like gloves and goggles.
Connect the charger securely to the battery terminals, red to positive and black to negative. Monitor the charger’s indicators during the process, ensuring it’s in a well-ventilated area.
After charging, disconnect the charger in the reverse order, safeguarding against sparks. If you encounter any issues, you might want to investigate troubleshooting tips for peace of mind.
Key Takeaways
- Choose the right charger type, like smart or solar, based on your battery needs and how you plan to use it.
- Prepare your vehicle by checking the battery for any damage and making sure the electrolyte levels are okay.
- Always wear safety gear such as gloves and goggles when working with batteries to protect yourself from acid and sparks.
- Connect the charger securely, making sure the terminals are correctly attached, and keep an ear out for any weird sounds or smells.
- After charging, turn off the charger, disconnect the negative cable first, and use a multimeter to check your battery’s health.
Types of Car Battery Chargers: What You Need to Know
In relation to car battery chargers, knowing the right type can make all the difference. You’ve got a few options to evaluate.
Smart chargers are a popular choice because they automatically adjust the charging rate based on the battery’s needs. This means you can leave them connected without worrying about overcharging or damaging your battery. They’re user-friendly and ideal for maintaining your battery’s health.
On the other hand, solar chargers offer a sustainable solution. If you’re looking to reduce your carbon footprint or power your battery while off the grid, these are perfect. They use sunlight to recharge your battery, making them a great option for outdoor enthusiasts or those who want to keep their vehicle charged during long periods of inactivity.
Preparing Your Vehicle for Charging: Essential Steps
Before you begin charging your car battery, it’s a good idea to check its condition first and make sure you have all the right tools on hand. Safety should always come first, so don’t forget to wear gloves and goggles to protect yourself. Once you’ve got everything ready and checked, you’re all set to start the charging process.
Inspect Battery Condition
Inspecting the battery condition is key to a successful charging process. Before you begin, take a moment to assess the battery’s health with a careful visual check. Here’s what you should look for:
First, check for any corrosion—white, ashy buildup around the terminals. Next, look for cracks or leaks in the battery casing, which could indicate damage or fluid leaks. If you have a serviceable battery, verify that the electrolyte levels are adequate.
Finally, make sure the terminals are tight and securely connected. A quick visual check like this can save you time and ensure everything is in good shape before charging.
Gather Necessary Tools
Gathering the right tools is essential for a smooth battery charging process. Start by getting a reliable car battery charger, making sure it’s compatible with your battery type.
You’ll also need safety goggles and gloves to protect yourself during the process. If you have a multimeter, it can help you check the battery’s voltage, which is a great battery maintenance tip.
Don’t forget jumper cables, as they can come in handy if the battery’s too drained to charge directly. Having a clean cloth can help wipe off any corrosion from the terminals.
With these essential tools in hand, you’re ready to tackle the charging process confidently and efficiently.
Ensure Safety Precautions
As you prepare to charge your car battery, it’s really important to prioritize safety to avoid accidents or injuries. Follow these safety tips to make sure everything goes smoothly.
First, wear protective gear like gloves and safety goggles to shield yourself from battery acid. Working in a well-ventilated area is also key—avoid charging in enclosed spaces to prevent harmful gases from building up.
Before connecting anything, check your cables and connectors for any signs of wear or fraying. This helps prevent electrical issues or sparks. When disconnecting the battery, always remove the negative terminal first to reduce the risk of sparks.
How to Connect the Charger: A Step-by-Step Guide
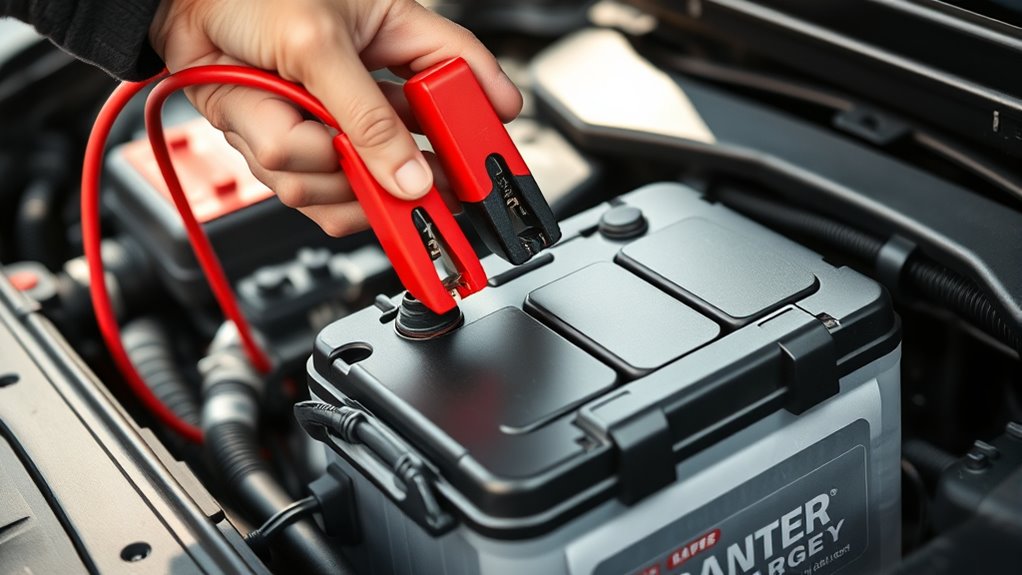
Now that your vehicle is all set, it’s time to connect the charger. First, take a moment to find the battery terminals so you’re sure about where to connect. It’s important to do this correctly to avoid any issues.
Once you’ve identified the terminals, go ahead and attach the charger cables securely. Just double-check that the connections are firm and in the right spots before you turn on the charger.
Identify Battery Terminals
Identifying battery terminals is key to safely connecting your charger. Start by getting familiar with the battery’s layout so you don’t get confused.
Here’s how to identify the terminals:
- Locate the Terminals: Find the positive (+) and negative (−) terminals. They are usually marked with color codes—red for positive and black for negative.
- Check Battery Polarity: Make sure you recognize which is which. Reversing the connections can damage your vehicle’s electrical system.
- Inspect for Corrosion: Look for any corrosion on the terminals. If you see buildup, clean it with a mix of baking soda and water.
- Confirm Secure Connections: Ensure the terminals are in good shape and free of debris before connecting the charger.
Taking these steps helps make sure your charging process is safe and smooth.
Connect Charger Cables
Connecting the charger cables is a crucial step in jump-starting your vehicle. Start by making sure the charger is off.
Next, attach the red cable to the positive terminal of your battery, paying attention to the charger’s polarity. Then, connect the other end of the red cable to the positive terminal of the charger.
Now, take the black cable and attach it to the negative terminal of the charger. Finally, secure the other end to a metal ground on your vehicle, away from the battery. This helps prevent sparks.
Remember to keep your cables organized so they don’t get tangled or damaged. Once everything is connected, you can turn on the charger and let it do its thing!
Adjusting Charger Settings for Optimal Charging
While you’re preparing to charge your car battery, adjusting the charger settings is key for the best performance. This ensures you get the right voltage and select the correct charging modes.
Adjusting your charger settings is essential for optimal battery performance, ensuring the correct voltage and charging mode are selected.
Here’s how to do it effectively:
- Select Charging Mode: Pick the right mode based on your battery type—standard, gel, or AGM.
- Set Voltage: Adjust the voltage to match your battery’s specifications, usually around 12 volts for most vehicles.
- Choose Amperage: Use a lower amperage for a slower, safer charge, or a higher one if you need a quick boost.
- Check Timer Settings: If your charger has a timer, set it to avoid overcharging, which can damage the battery.
How to Monitor the Charging Process?
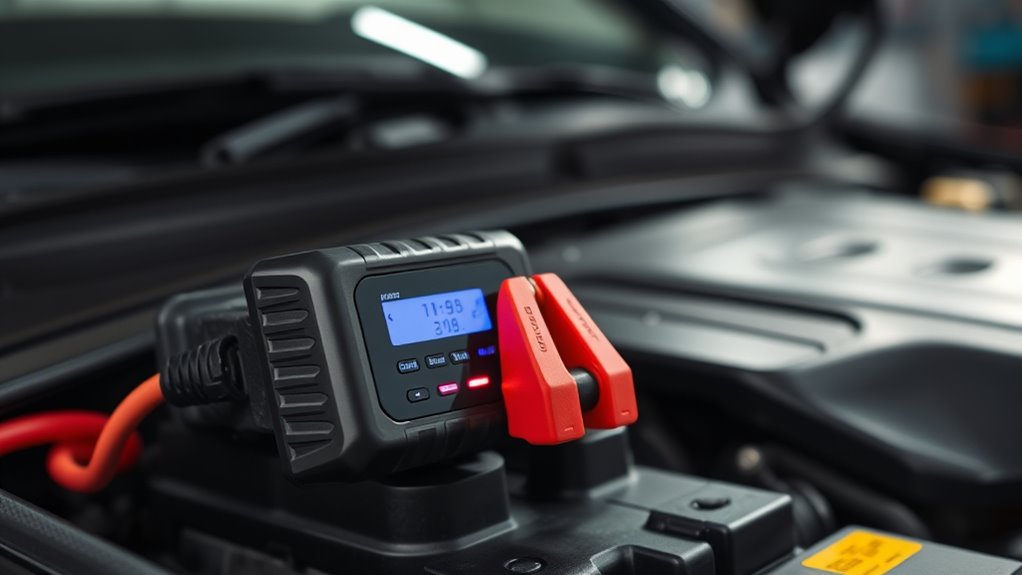
Monitoring the charging process is key to making sure your battery charges safely and effectively. Start by checking the charger’s indicators. These lights usually show if the battery is charging, fully charged, or if there’s a problem.
If your charger has a digital display, look at the voltage and amperage readings. These numbers can give you a good idea of your battery’s health. Use simple techniques, like setting a timer based on your battery’s specs, so you know when to check on it.
If you notice any strange sounds, smells, or if the charger gets hot, stop charging right away. Keep an eye on the indicators to make sure everything’s going smoothly. Staying attentive during charging helps protect your battery and makes it last longer.
How to Safely Disconnect Your Charger?
Once your battery is fully charged and the indicators show it’s safe to proceed, it’s time to disconnect your charger. Following proper procedures ensures your safety and helps keep your battery in good shape.
First, turn off the charger before unplugging it. This helps prevent any electrical surges that could cause problems.
Next, disconnect the negative (black) cable first. Doing this reduces the risk of a short circuit.
Then, carefully remove the positive (red) cable. Be gentle to avoid damaging the connectors.
Finally, make sure your charger is unplugged and stored in a dry, safe place. This keeps everything ready for your next use.
Troubleshooting Common Charging Issues
Have you ever wondered why your car battery charger isn’t working as expected? You’re not alone. Many people fall for charging myths, thinking that a charger can magically revive a dead battery.
First, check the connections. Loose or corroded terminals can prevent proper charging. Next, confirm your charger is compatible with your battery type; using the wrong charger can shorten your battery’s lifespan.
Check the connections for looseness or corrosion, and ensure your charger matches your battery type to avoid damage.
If the charger’s lights indicate it’s working but your battery isn’t charging, it might be time to test the battery itself. A multimeter can help you measure the voltage. If it’s notably low, your battery may need replacing.
Finally, if you’re still facing issues, consult the charger’s manual for troubleshooting tips. Remember, regular maintenance and understanding your equipment can make all the difference in extending your battery’s life and ensuring reliable performance.
Frequently Asked Questions
Can I Charge a Battery in Extreme Temperatures?
Yes, you can charge a battery in extreme temperatures, but be cautious. Temperature can affect how well the charging works and how long the battery lasts.
In cold weather, it might take longer to charge the battery. In hot weather, there’s a risk of the battery overheating. Use the right charging techniques, like keeping an eye on the temperature and using a smart charger that adjusts the charge rate.
Always check the manufacturer’s guidelines for your specific battery. That way, you can make sure you’re charging it safely, no matter the weather conditions.
How Long Does a Car Battery Typically Last?
A car battery usually lasts between 3 to 5 years, but factors like climate, driving habits, and maintenance can influence how long it actually stays good.
You’ll notice it’s time for a replacement if your engine has trouble starting, the lights seem dim, or your electronics aren’t working properly.
If you see these signs, it’s a good idea to check your battery’s health. Regular inspections can help you stay ahead of potential problems and keep your car reliable on the road.
Don’t wait too long to address any issues—you’ll thank yourself later.
What Should I Do if My Battery Won’T Hold a Charge?
If your battery won’t hold a charge, it’s probably time to consider replacing it. Did you know nearly 25% of car batteries fail within three years?
To avoid this, check your charging habits. Make sure you’re not leaving lights on or taking short trips that prevent the battery from fully charging.
If your battery still struggles after a recharge, then a replacement is likely needed to keep your vehicle running smoothly.
Are There Safety Precautions for Charging Indoors?
Yes, there are safety precautions for charging indoors. Make sure you have good indoor ventilation to prevent harmful gases from building up.
Keep the area clear of flammable materials to avoid fire hazards. Always place the charger on a stable surface and never leave it unattended.
Familiarize yourself with your charger’s manual for any specific safety guidelines. By following these precautions, you can charge your battery safely indoors without worry.
Can I Use a Charger on a Dead Battery?
Yes, you can use a charger on a dead battery. Just make sure to connect it correctly and set it to the right voltage.
Different battery types like lead-acid and lithium-ion might need specific charging methods. Be sure to follow those guidelines.
Keep an eye out for any signs of swelling or overheating during charging. If it still doesn’t hold a charge after a few tries, you might need to replace the battery.
Stay safe and always follow the manufacturer’s instructions.
Conclusion
To summarize, using a car battery charger can be a simple and effective way to keep your vehicle running smoothly. Did you know that nearly 25% of all roadside breakdowns are caused by dead batteries?
By following these seven steps, you can avoid being part of that statistic and ensure your car is always ready to go. So, grab your charger and start taking charge of your vehicle’s battery health today!